We last left off at us having started applying the Reflectix to Maude's end caps, but we ran out of materials.
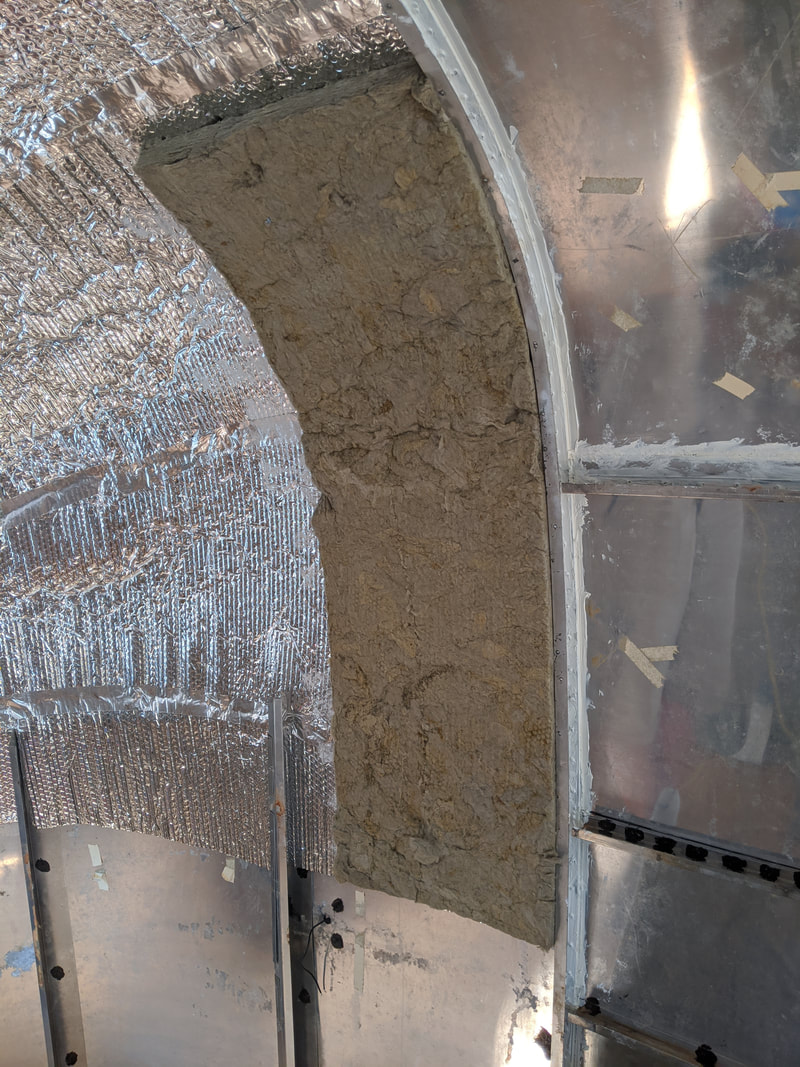
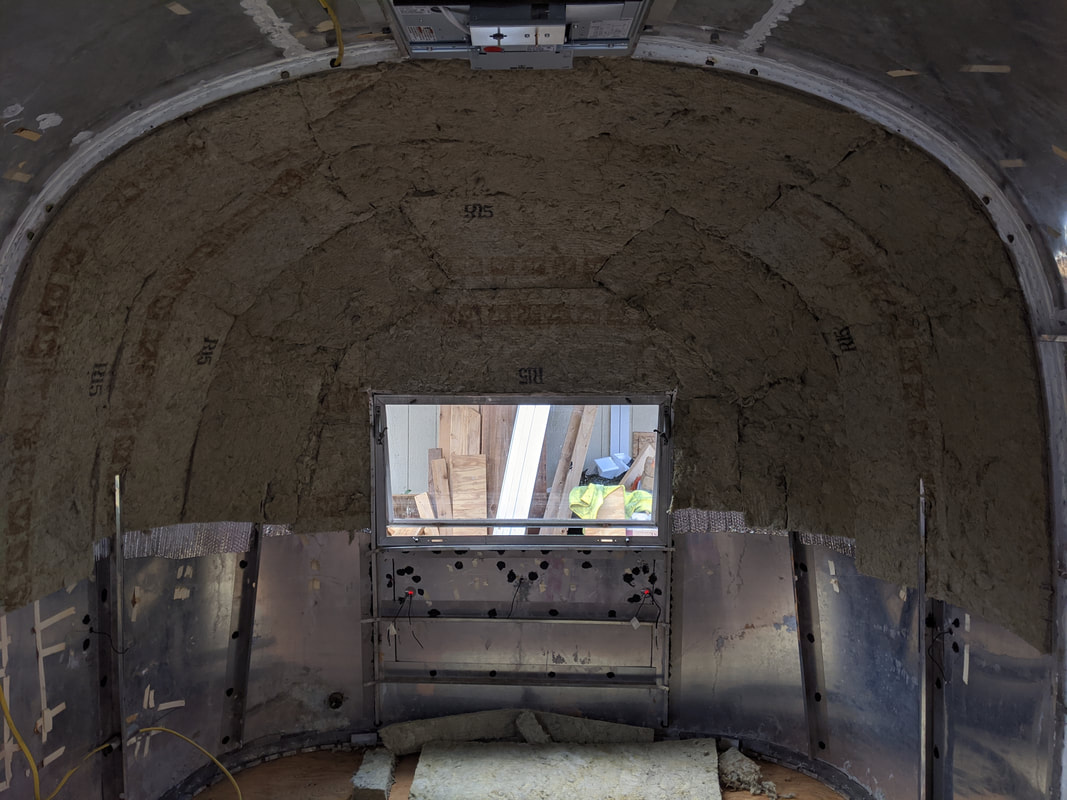
We got more Reflectix and spray adhesive, so we were able to complete the job :) We also were able to put the Rockwool Insulation in place! We were really excited when the spray adhesive held it in place really nicely (we weren't sure if it'd be too heavy). This part went really quickly and smoothly!
We got more Reflectix and spray adhesive, so we were able to complete the job :) We also were able to put the Rockwool Insulation in place! We were really excited when the spray adhesive held it in place really nicely (we weren't sure if it'd be too heavy). This part went really quickly and smoothly!
 |  |
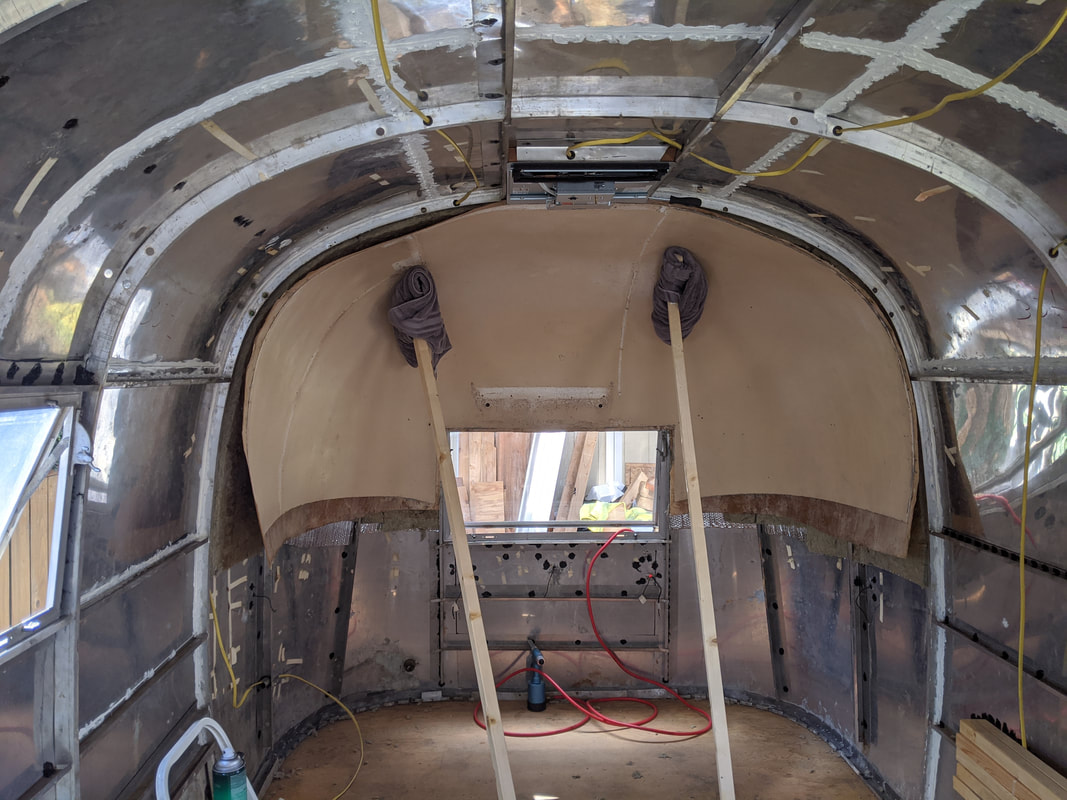
We might have gotten too excited about getting the endcaps into place - the rest of it isn't going as smoothly as one would hope ;)
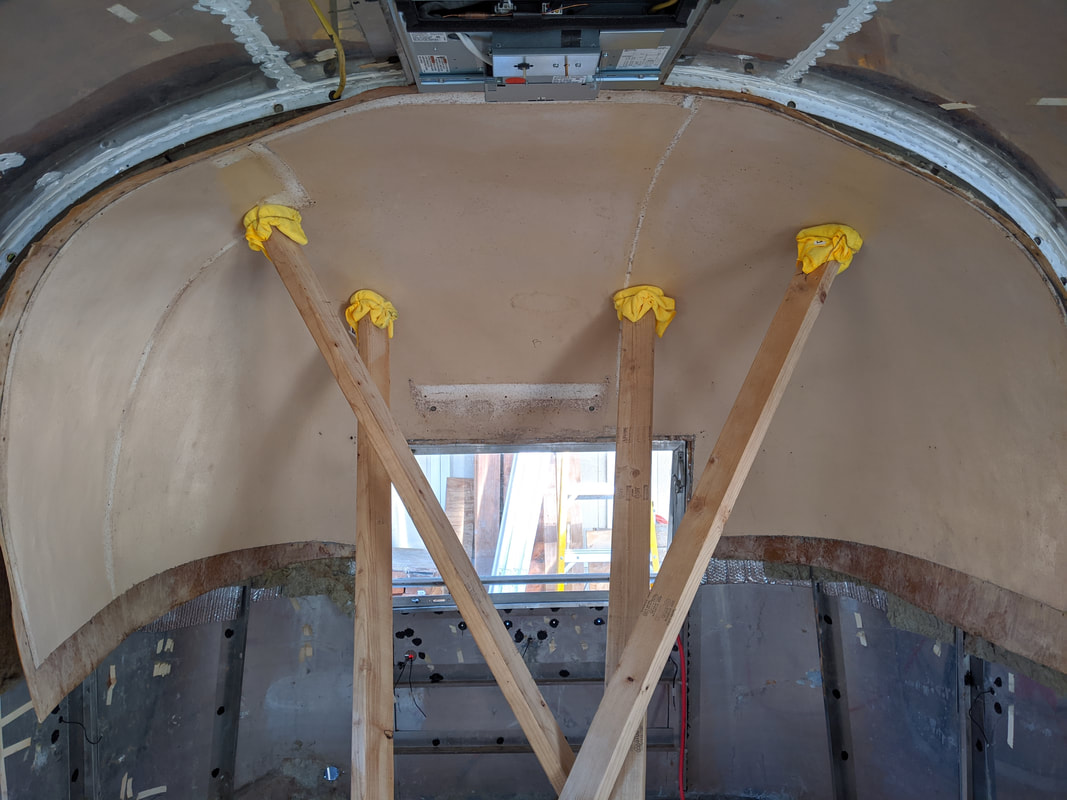
We seem to have several factors working against us : 1. The endcaps sat in the shed for a year, so perhaps the heat allowed them to shift shape a bit. 2. The trailer shell might not be in the exact shape as it was originally since it had deteriorated over her 60 years. 3. We're working against a thicker insulation than she'd had originally.
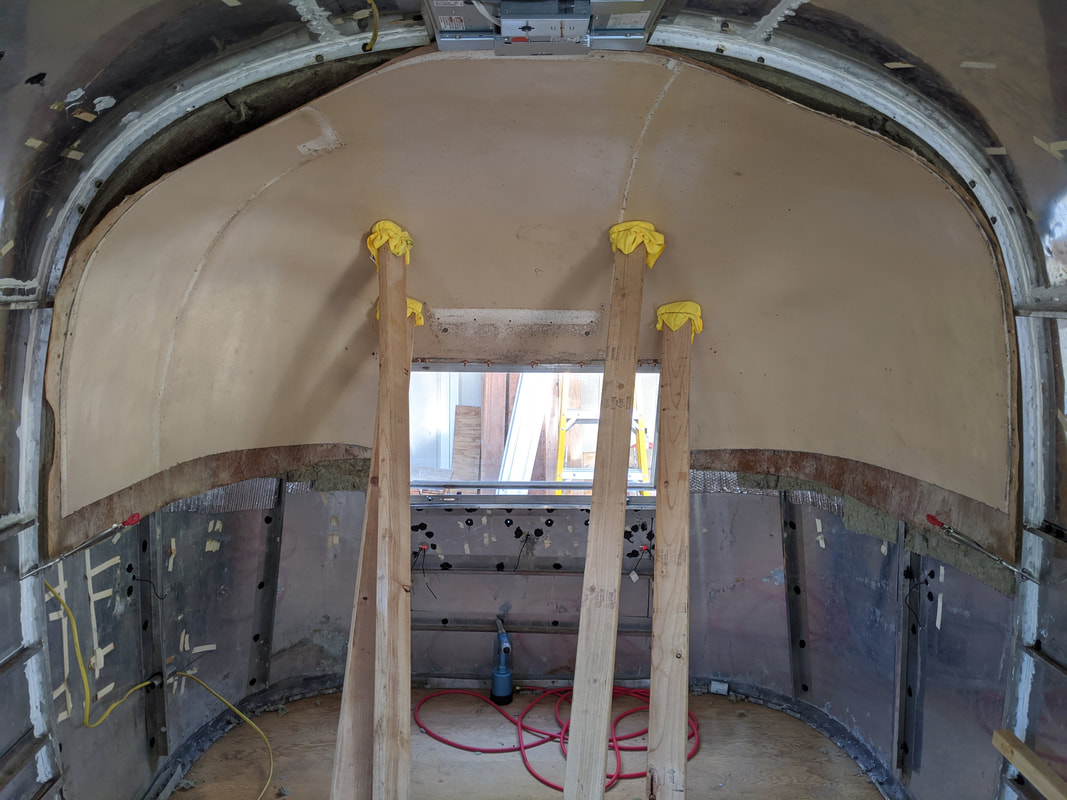
Regardless, we're having trouble getting the endcap into anything resembling an original location ;) We're using the boards to hold it up, but to try to get it to form to the curve better. Another complicating factor is that there aren't any ribs under the endcap! The only places it attaches to the shell is around the window frame and at the front of the endcap at the big archway. So trying to get all of that to line up while not creating gaps along the curves is super tricky!
We seem to have several factors working against us : 1. The endcaps sat in the shed for a year, so perhaps the heat allowed them to shift shape a bit. 2. The trailer shell might not be in the exact shape as it was originally since it had deteriorated over her 60 years. 3. We're working against a thicker insulation than she'd had originally.
Regardless, we're having trouble getting the endcap into anything resembling an original location ;) We're using the boards to hold it up, but to try to get it to form to the curve better. Another complicating factor is that there aren't any ribs under the endcap! The only places it attaches to the shell is around the window frame and at the front of the endcap at the big archway. So trying to get all of that to line up while not creating gaps along the curves is super tricky!
We got frustrated enough with it, that we left it for the day. ;) We find that taking some time to think about a problem really helps figure out our next steps. We still had a lot of time left in the day, so we started working on some other projects that still need to be completed before the inner skins can go back on.
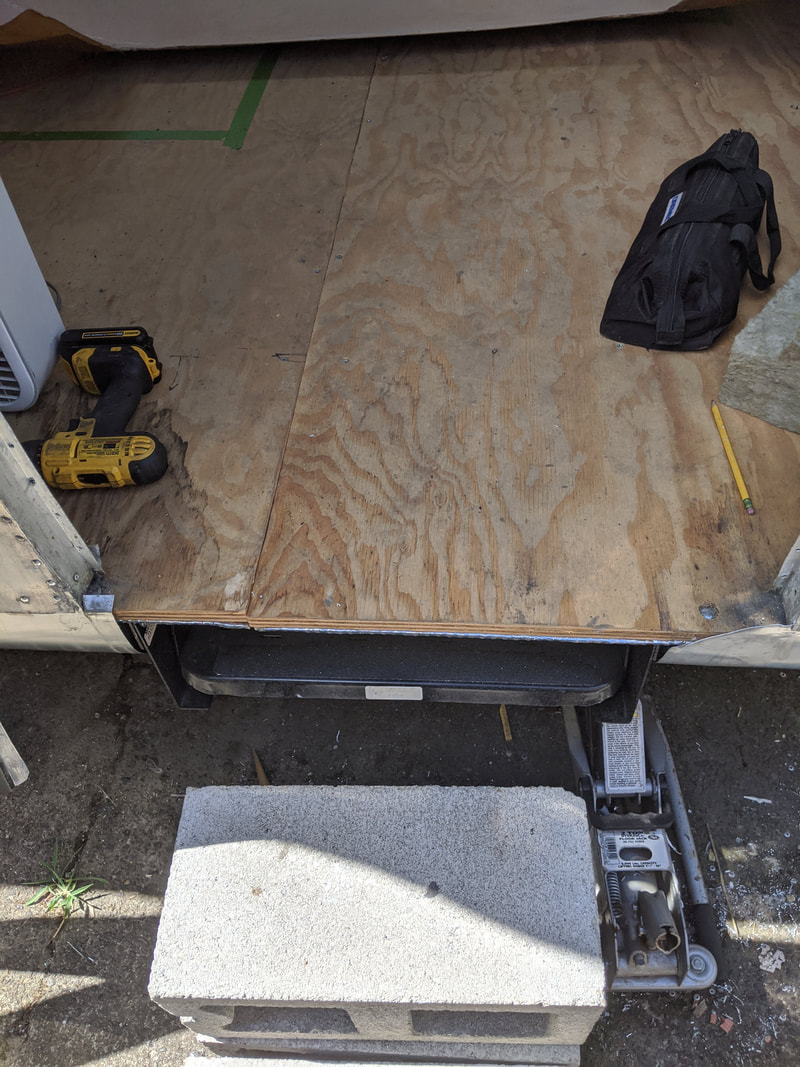 | 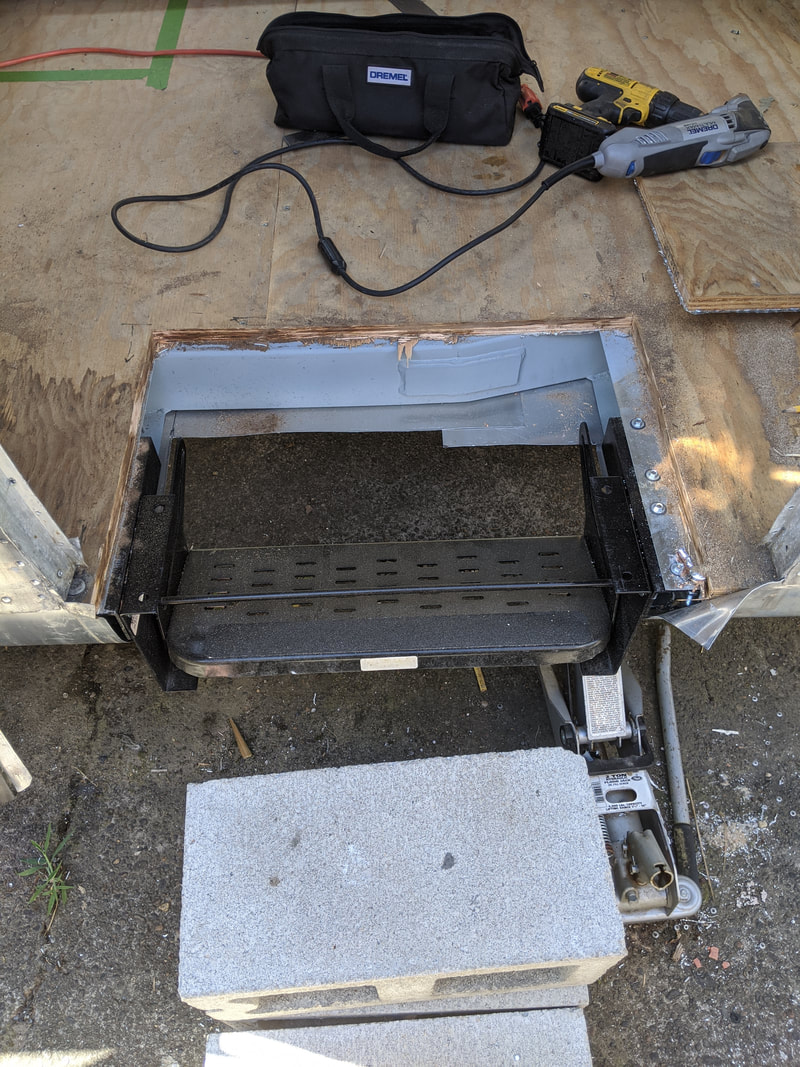 |
Above is the doorway and stairs. As you can see, the plywood subfloor ended up with a join right in the doorway. It made for a really wussy entry that bends under our steps. Also, the stairs are uncentered in the doorway, which was driving me nuts. This was not gonna cut it! So we cut it out ;) We did some problem solving to figure out how to remedy all of these issues, and decided that a trip to the metal scrapyard was in order. But we wouldn't be able to make it until the following weekend. So.... onto yet another project! LOL
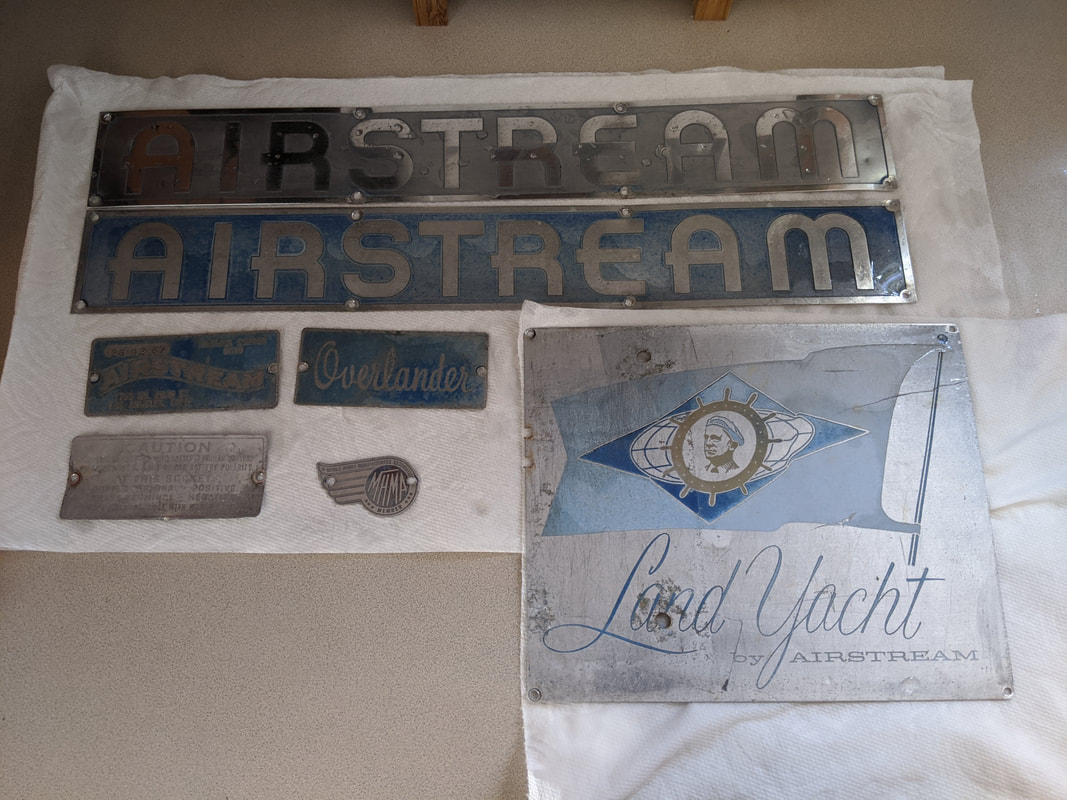
I removed and cleaned all of Maude's emblems to get them prepped for repairing, polishing and painting. At this point, the day had been a bit disappointing in that we didn't FINISH anything, but we called it a night.
The next day we decided to retry tackling the endcap. We used more boards to help support and shape it. This seemed to go a bit smoother! Plus, I think letting it sit overnight allowed it to heat and cool in a position that was closer to it's original shape!
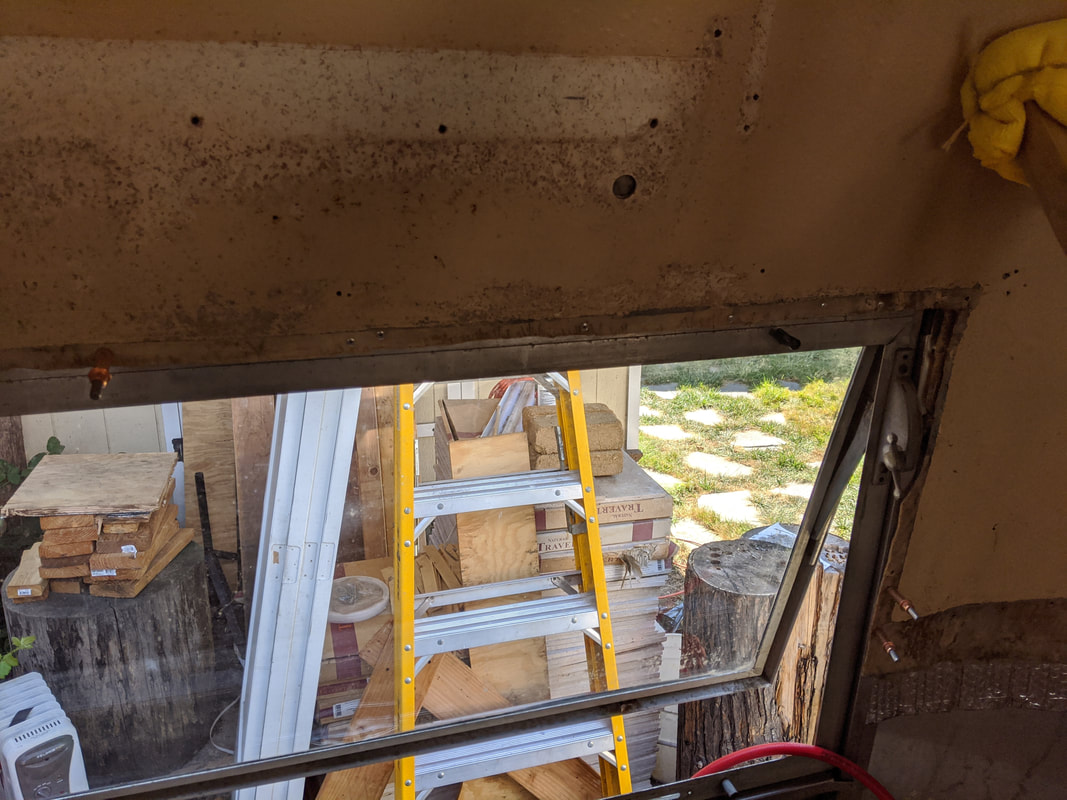
We were able to get the rivets in around the windows this time!! This was quite the win after our struggle the day before LOL!
But we still had a hard time getting the edge of the endcap to meet up with the rib properly. We decided that we were never going to be able to get the old rivet holes to match up - so we drilled new ones. We got some rivets in at the top of the outer curve right by the AC unit, which was a huge win! But we found that trying to get the curves to fit as well as we would like wasn't working. We again stopped for the day. We're hoping that more resting in the heat will help us some more? We'll see!
We're taking a little break from working on Maude while we get the girls settled into the new routine of school, so you won't be seeing new progress reports for a couple of weeks, but don't worry, we'll get back to kicking butt again soon!
Until next time! <3 Becca
We're taking a little break from working on Maude while we get the girls settled into the new routine of school, so you won't be seeing new progress reports for a couple of weeks, but don't worry, we'll get back to kicking butt again soon!
Until next time! <3 Becca
