It felt nice to get some more work done on Maude. I know it doesn't look like a huge amount of work accomplished, but this was about 4 hours of work (not counting the trip to Costco!)
Until next time! <3 Becca
Thrive Acupuncture PDX |
|
Howdy! I know it's been a while since I've posted about Maude! We made some forward progress this weekend :) 
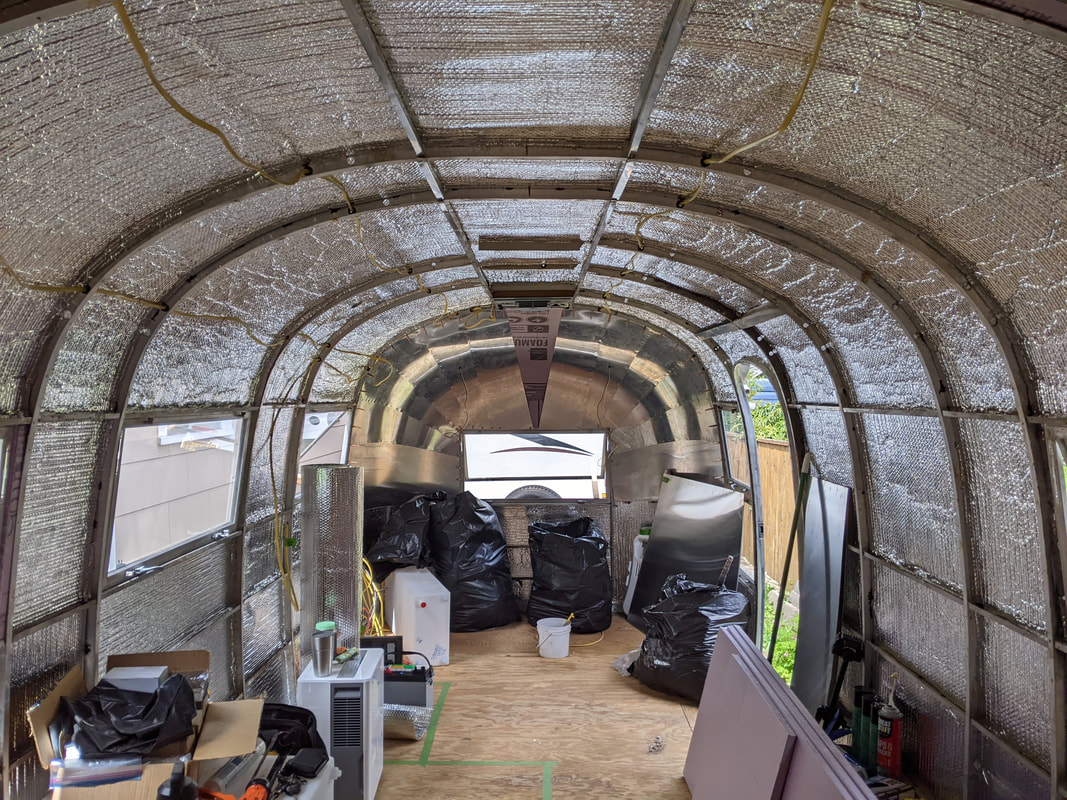
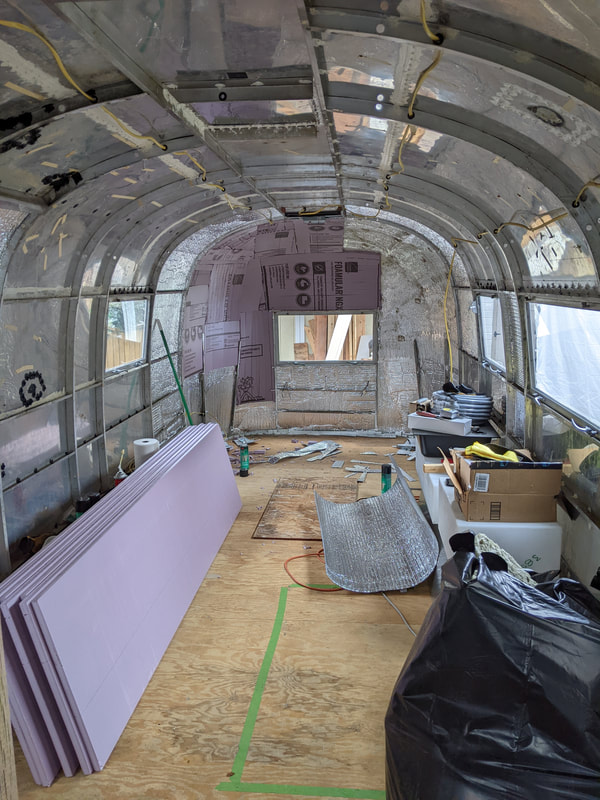
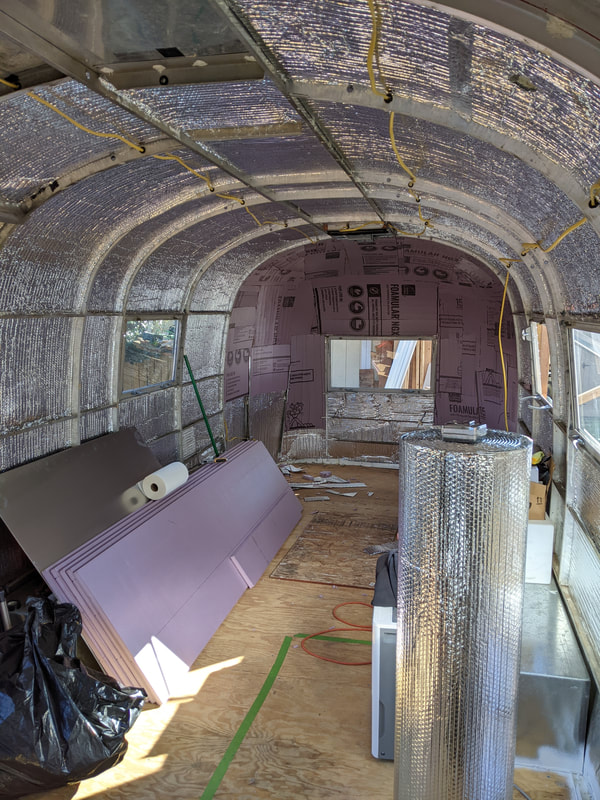
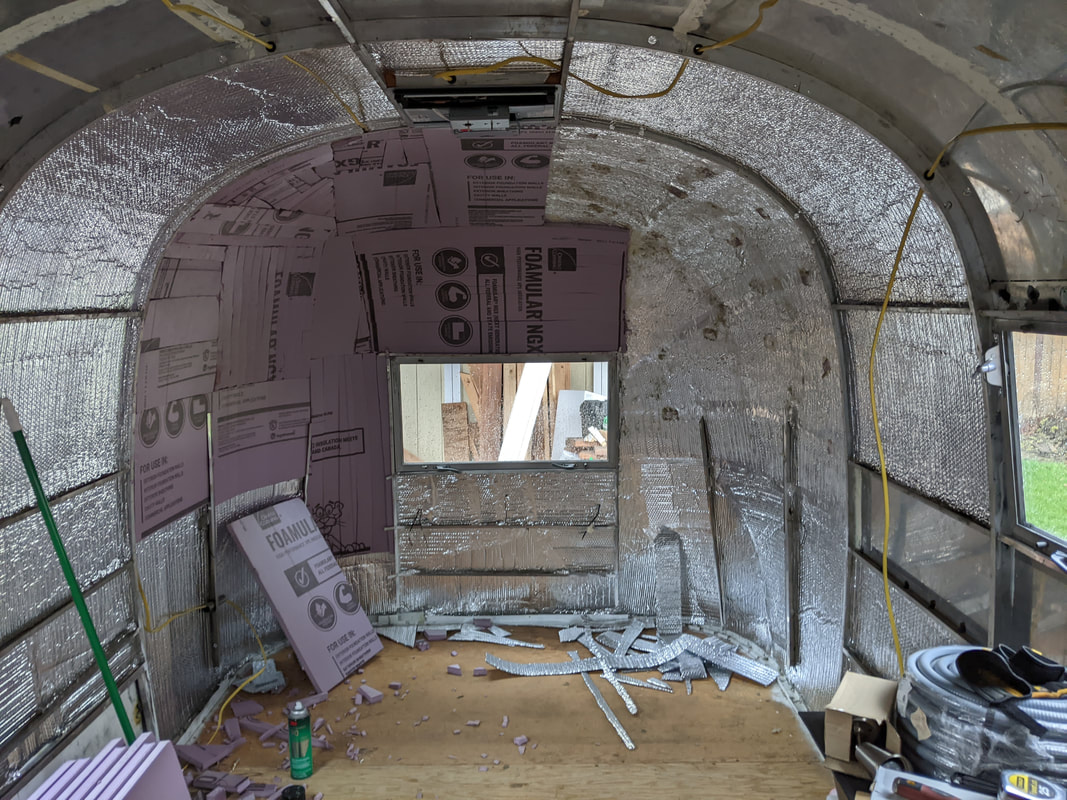
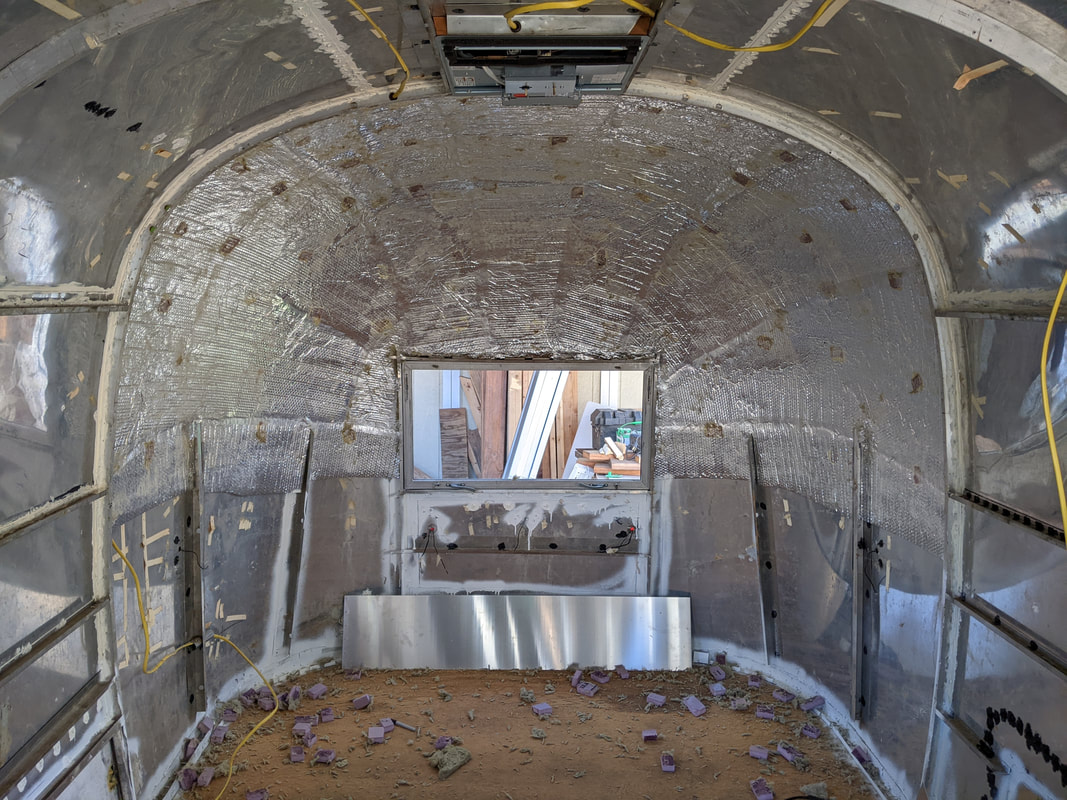
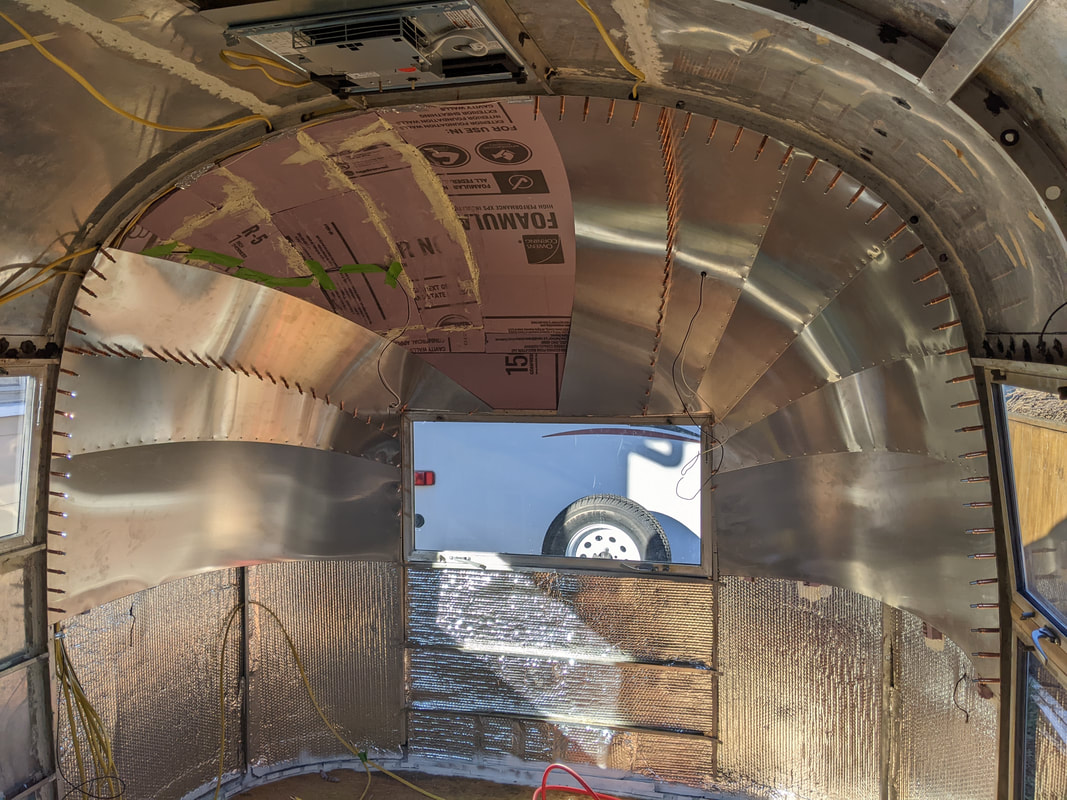
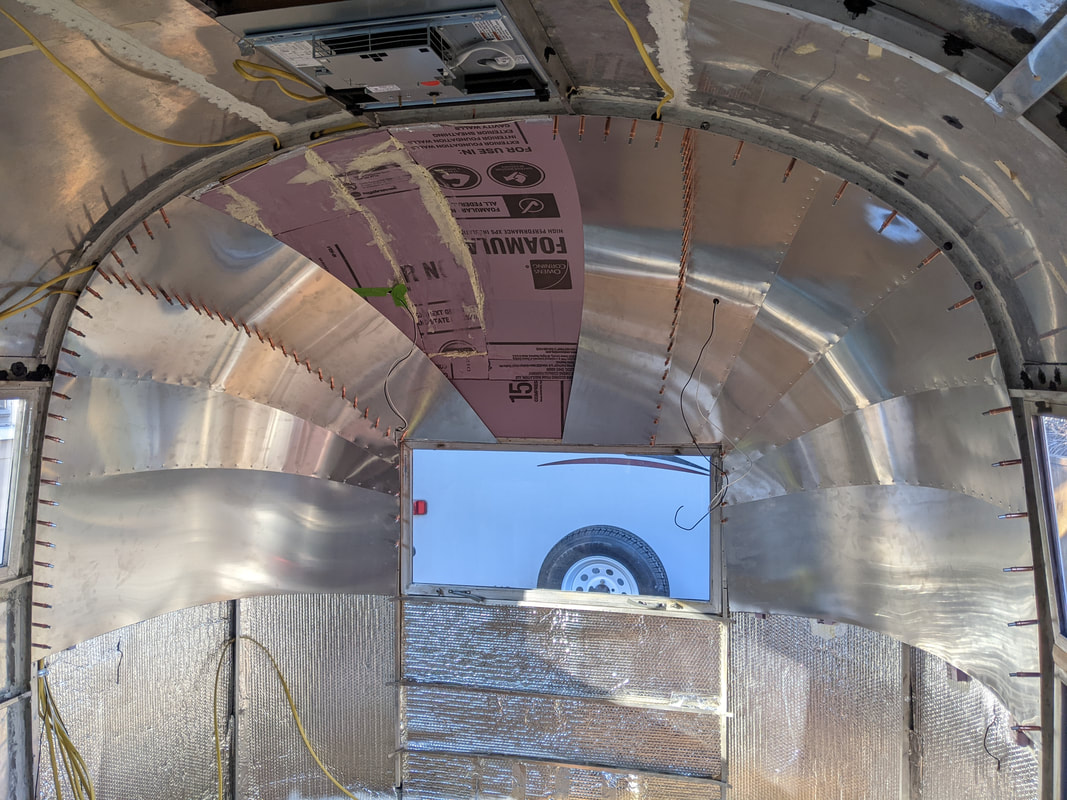
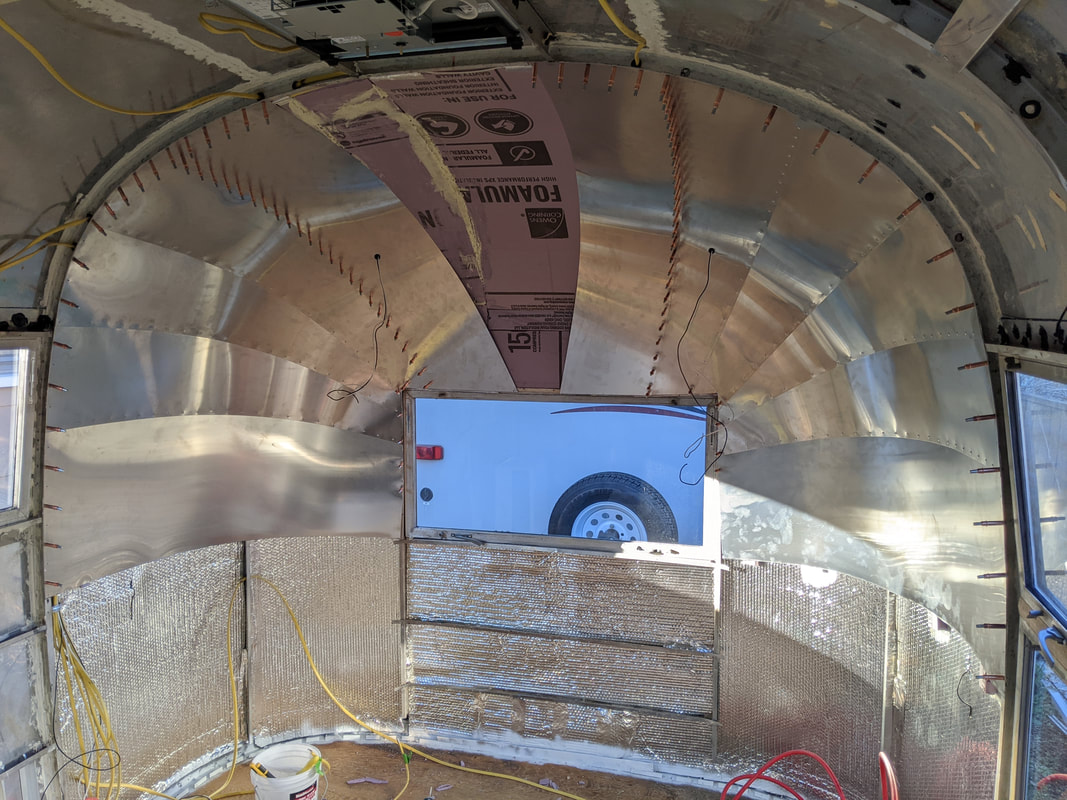
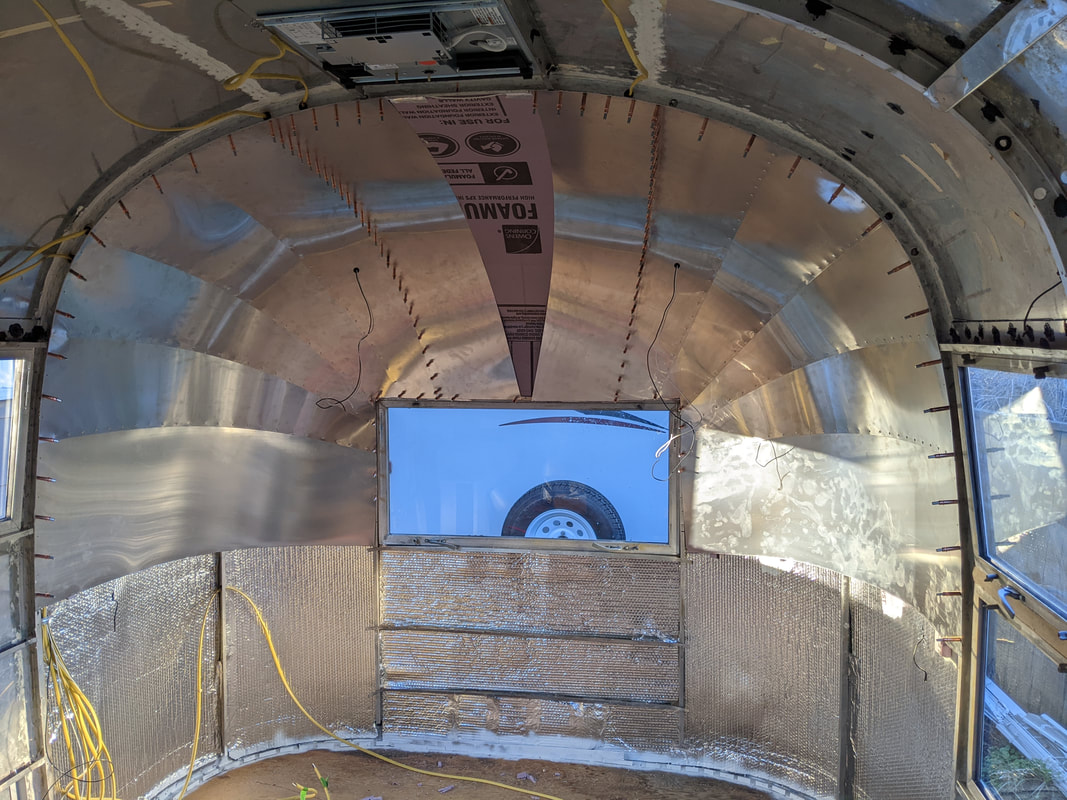
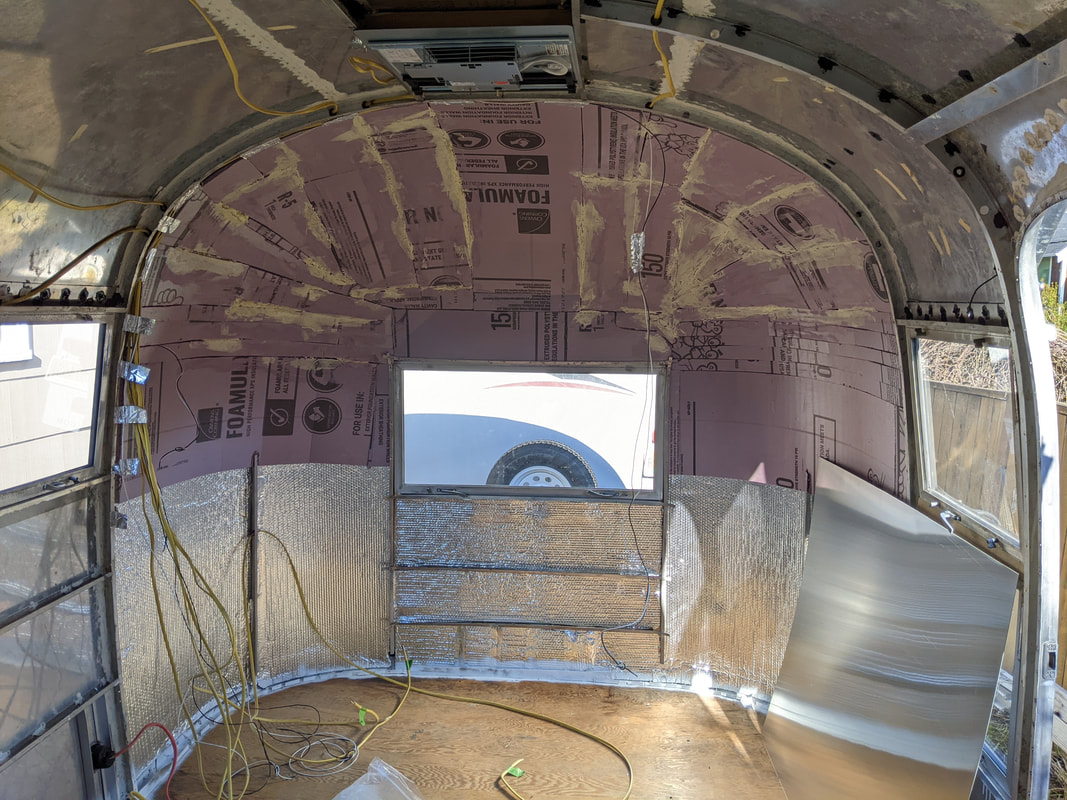
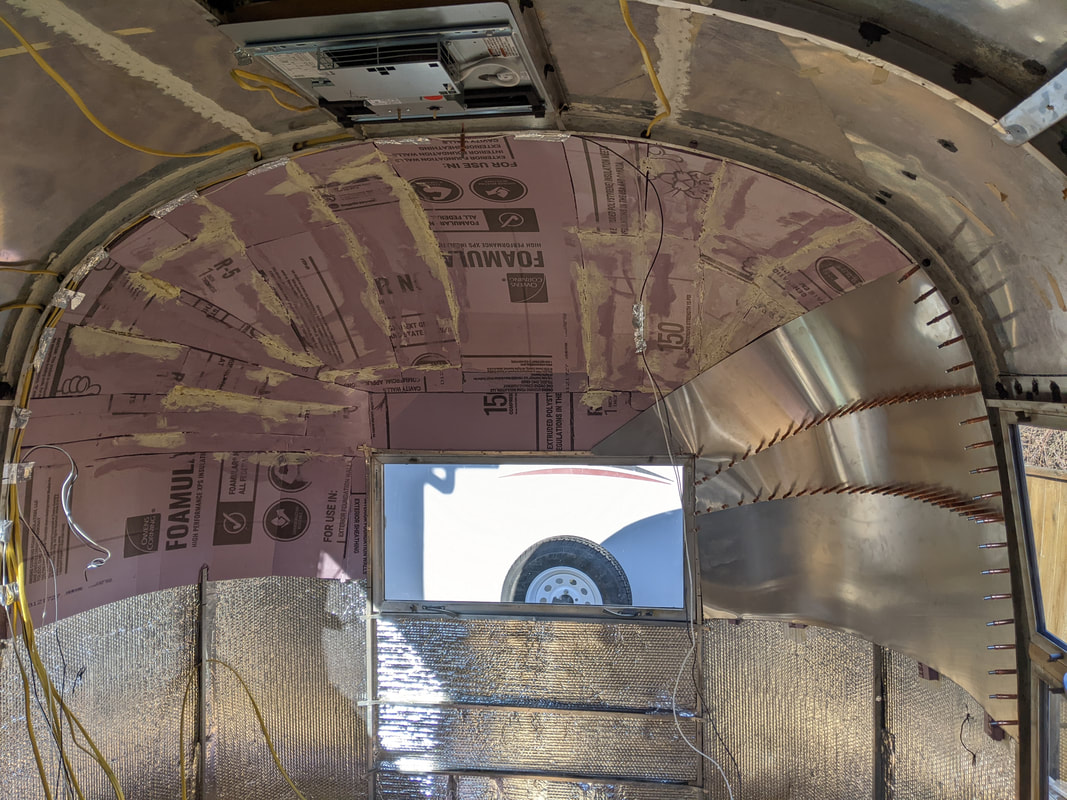
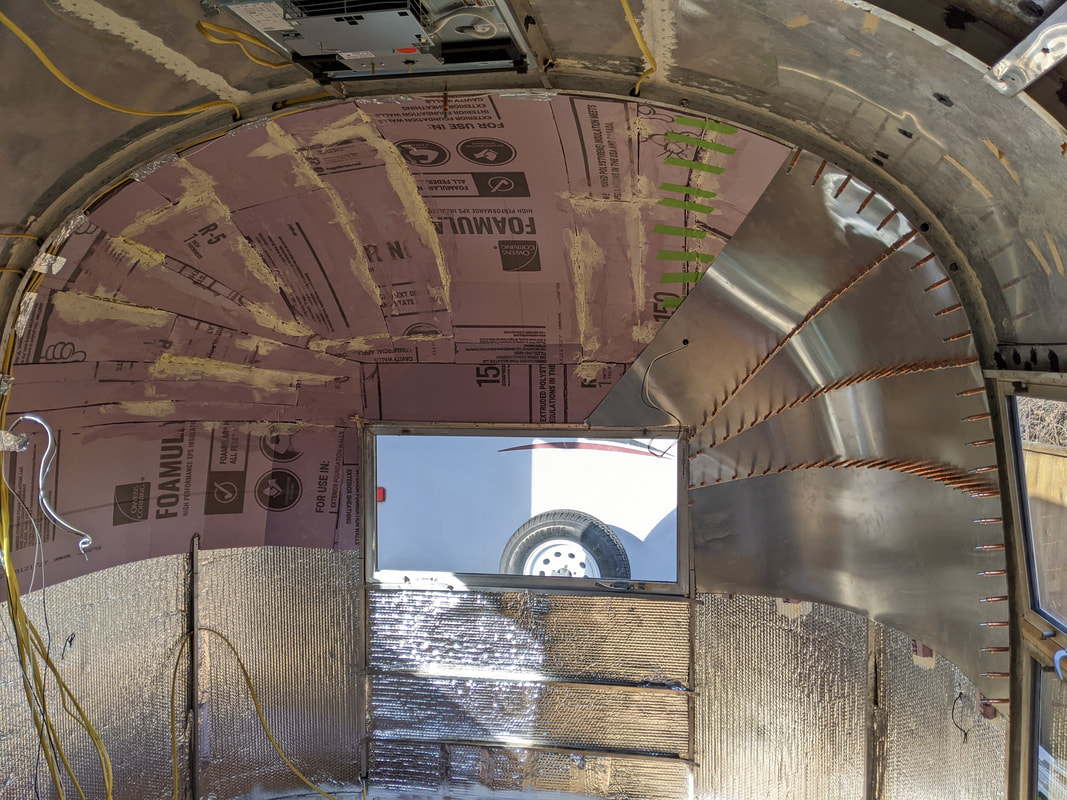
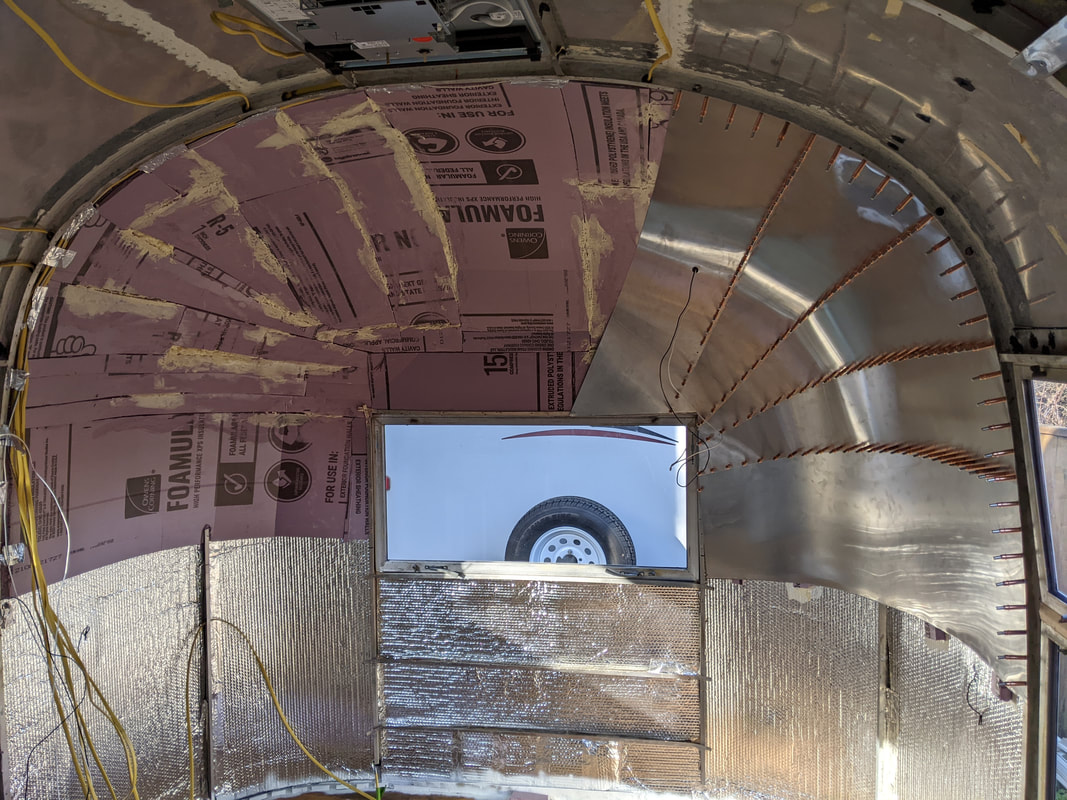
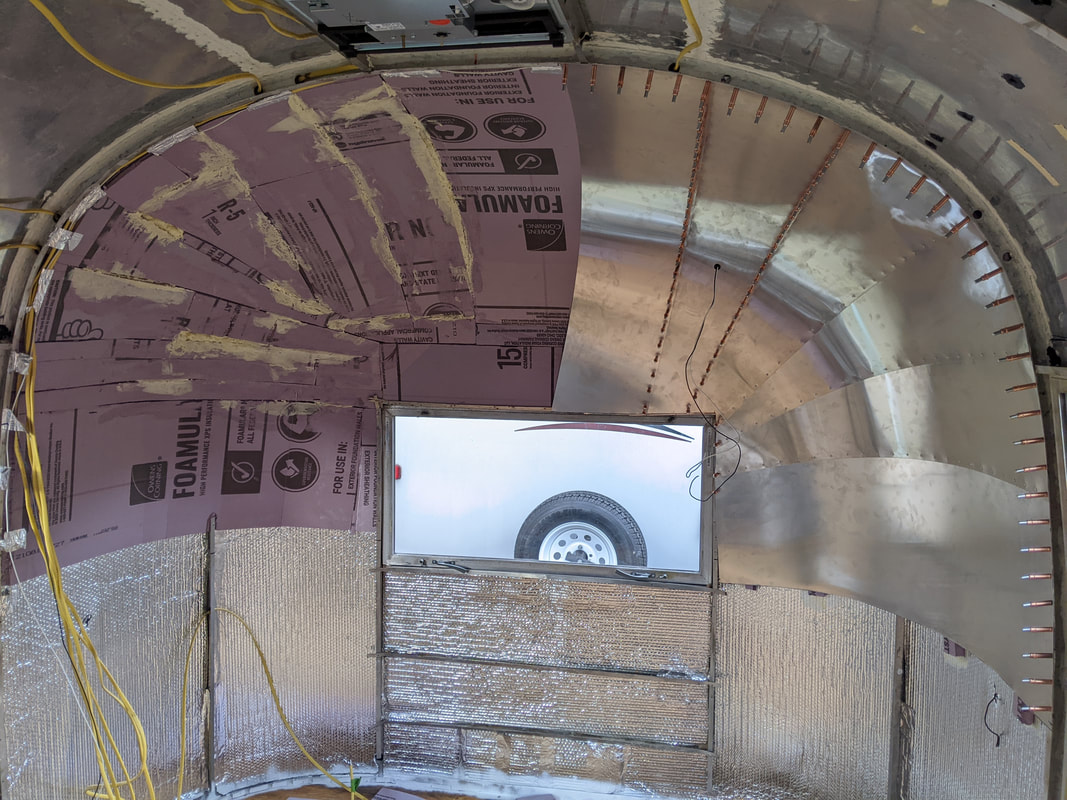
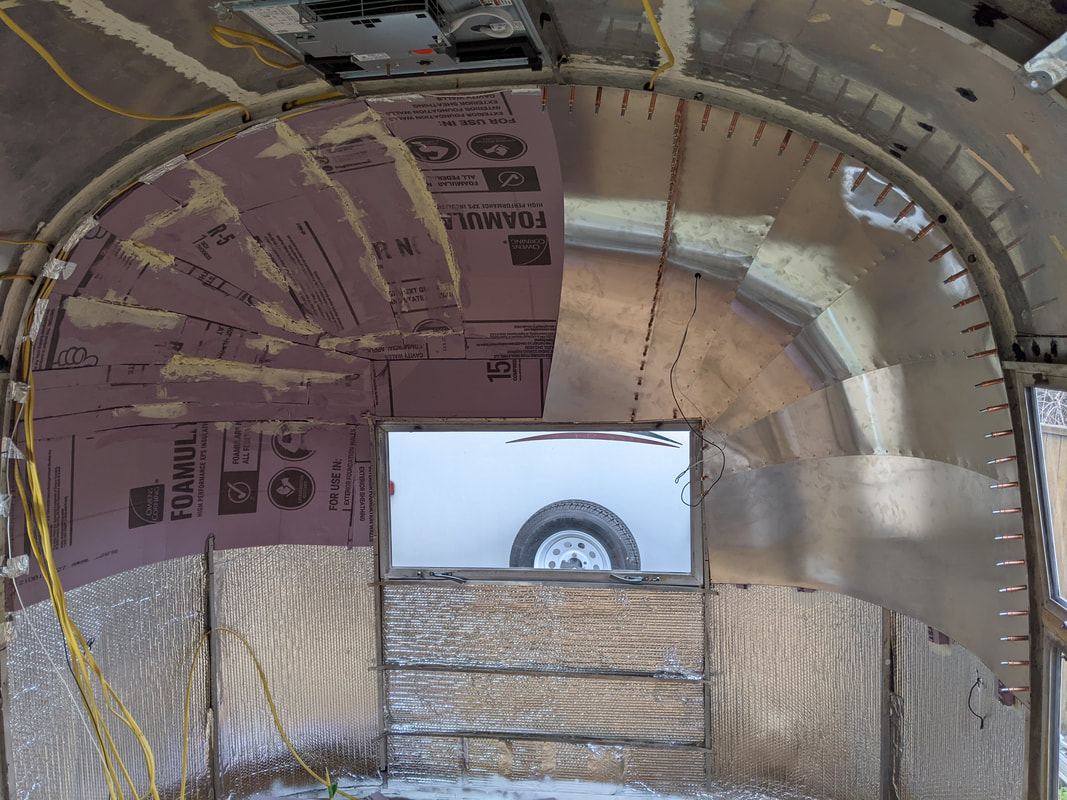
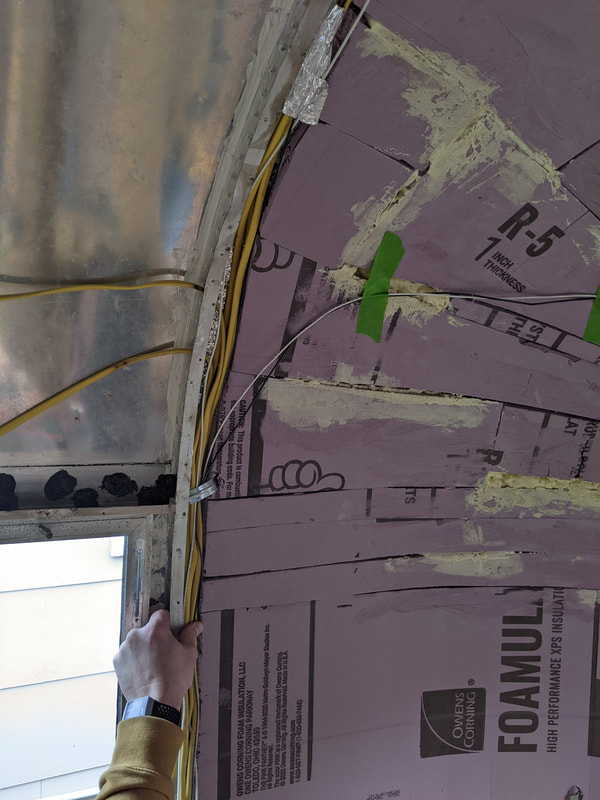
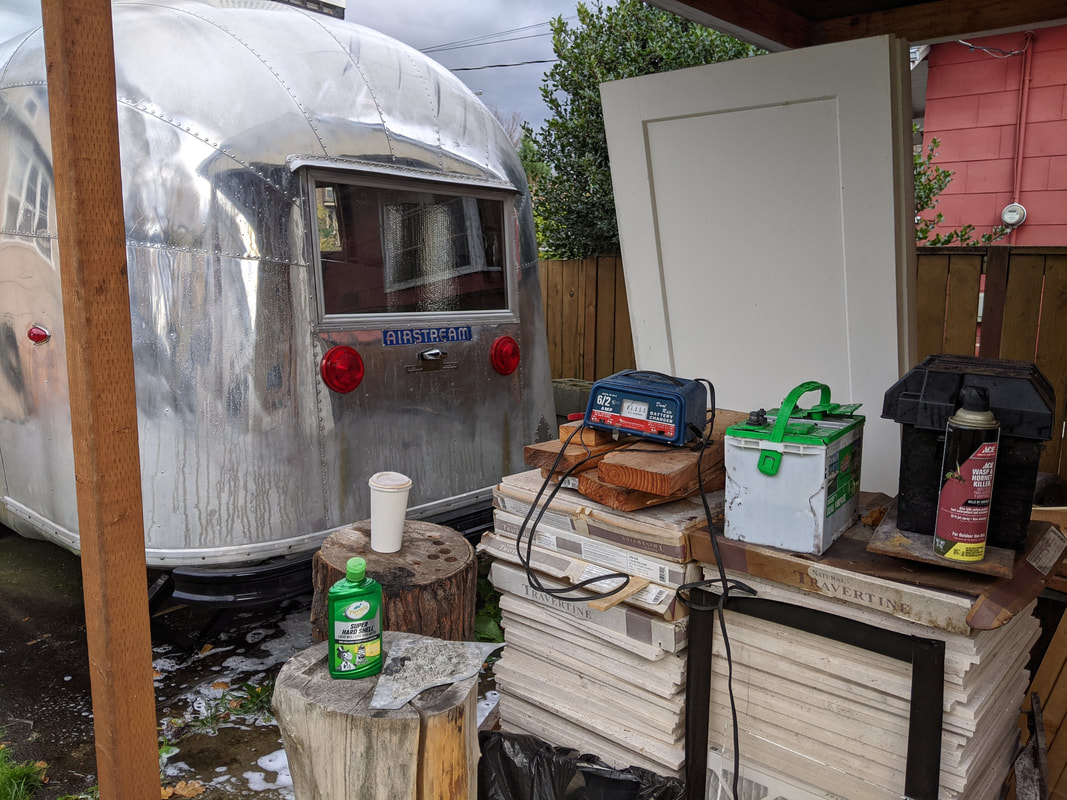
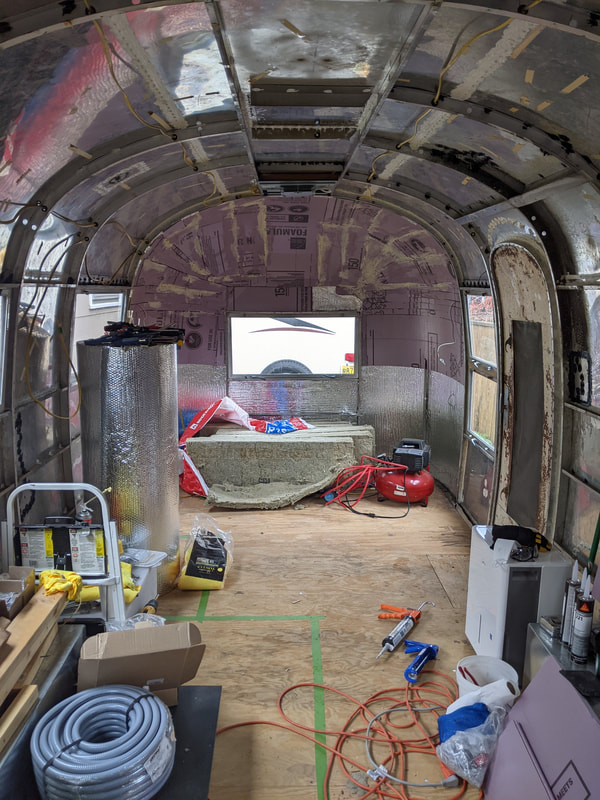
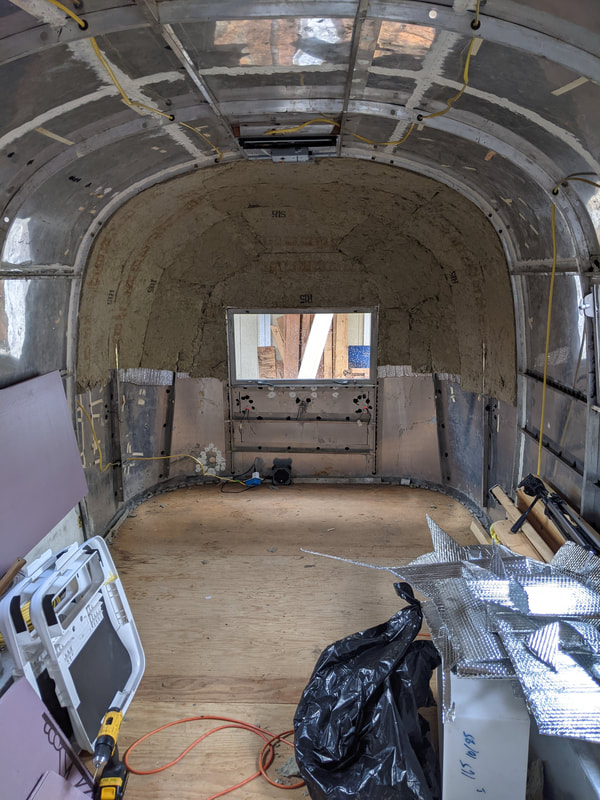
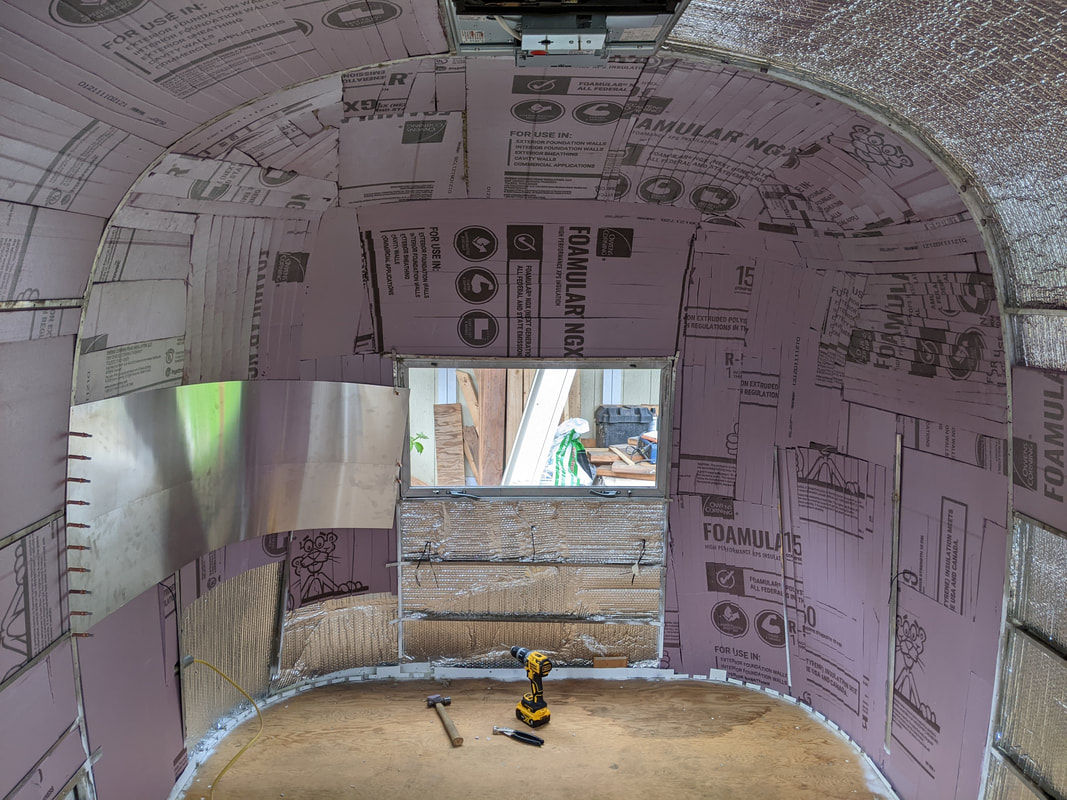
We finished installing the Reflectix insulation! We also got some more purple foam insulation installed, but we stopped that project, realizing that we needed to get the 12-volt wiring done first, which meant a trip to Costco to get a battery (since we blew up the one we were going to use! LOL). 
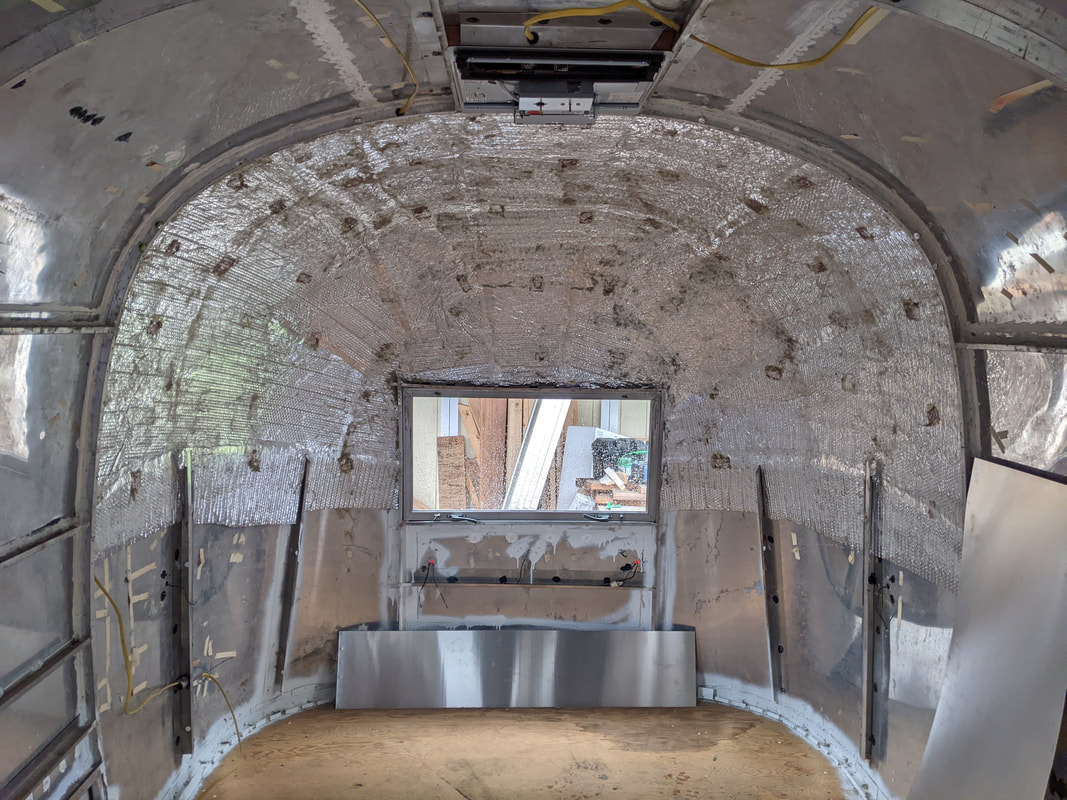
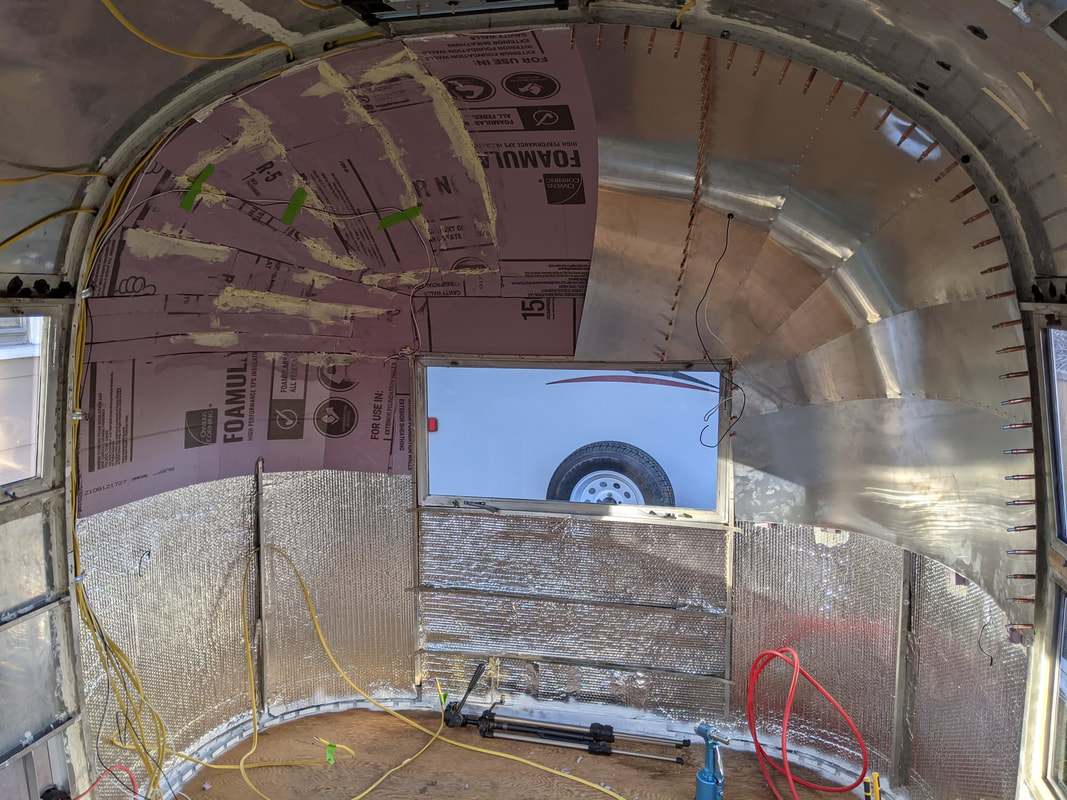
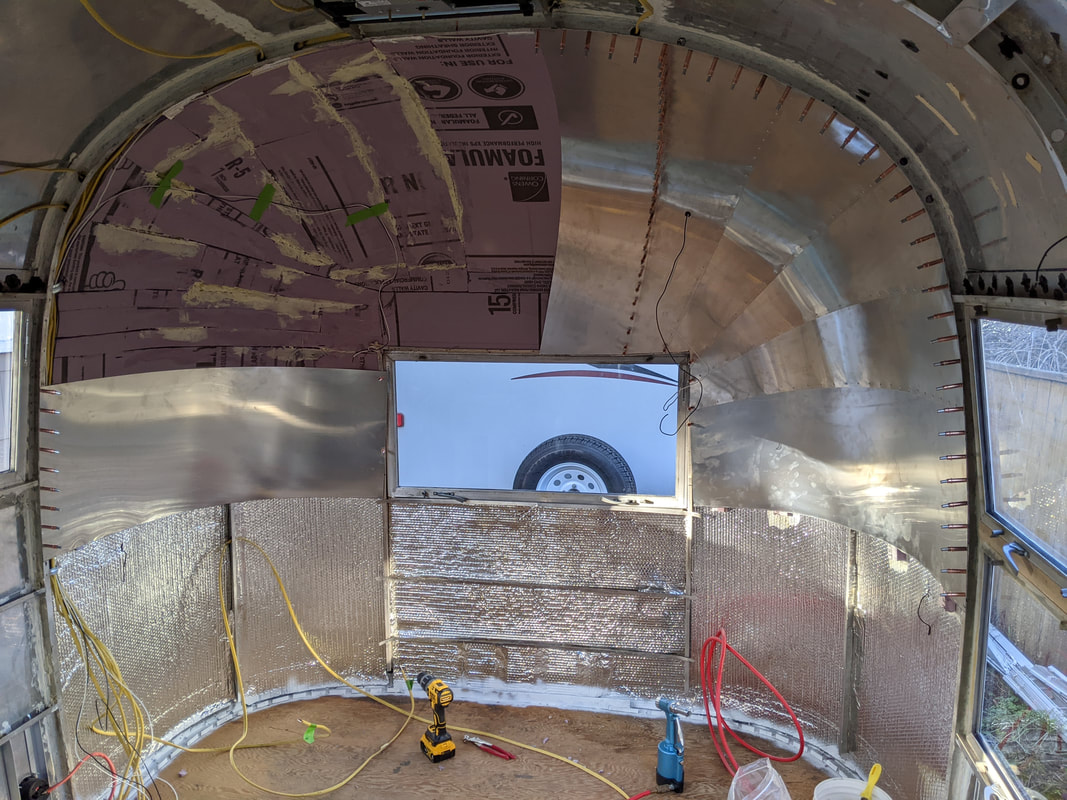
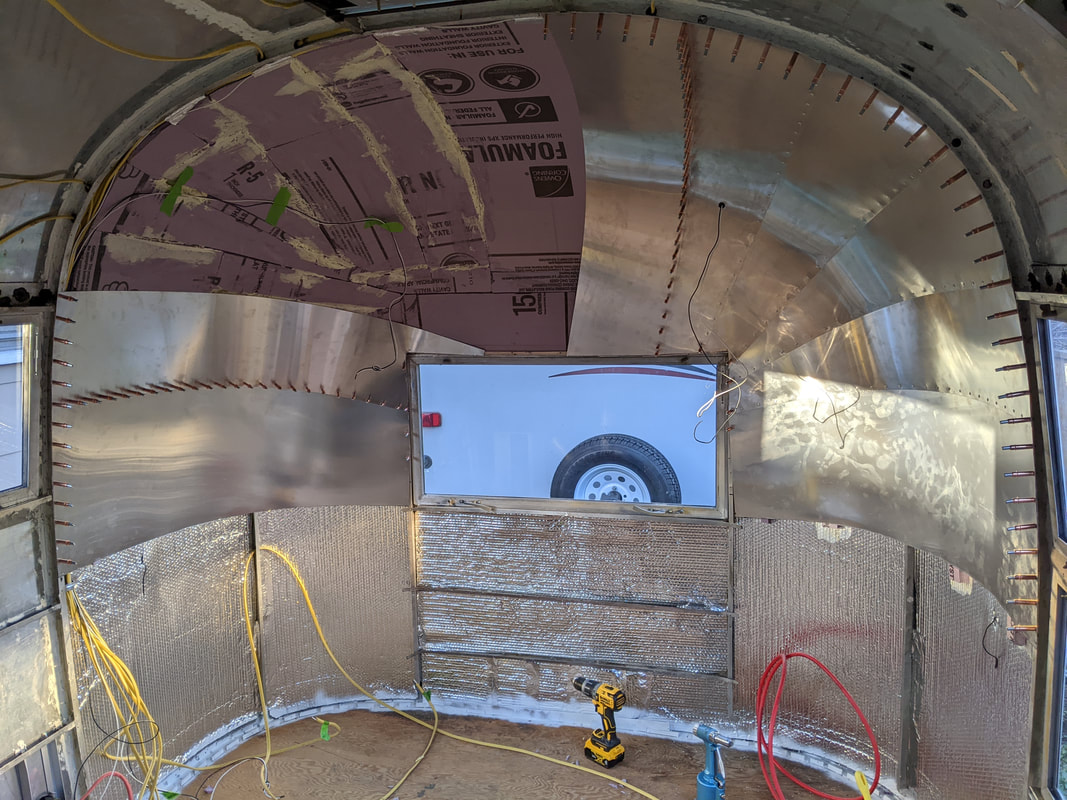
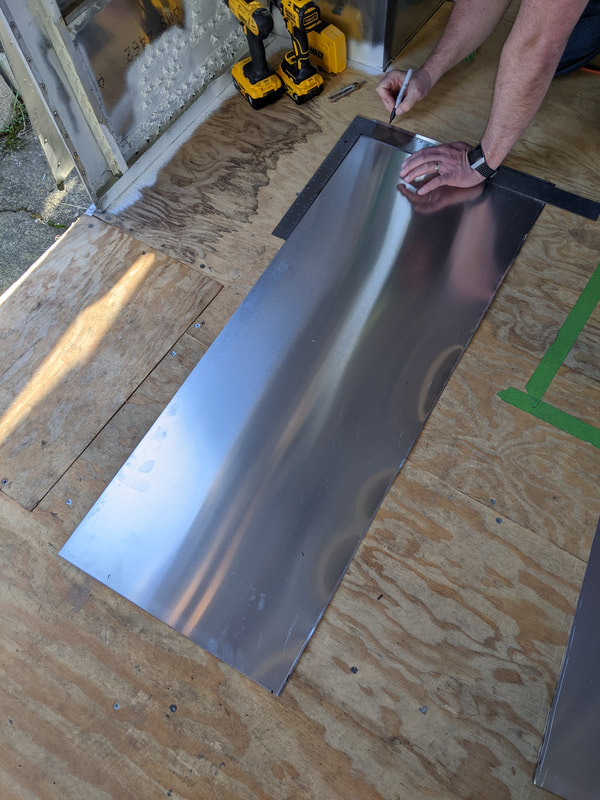
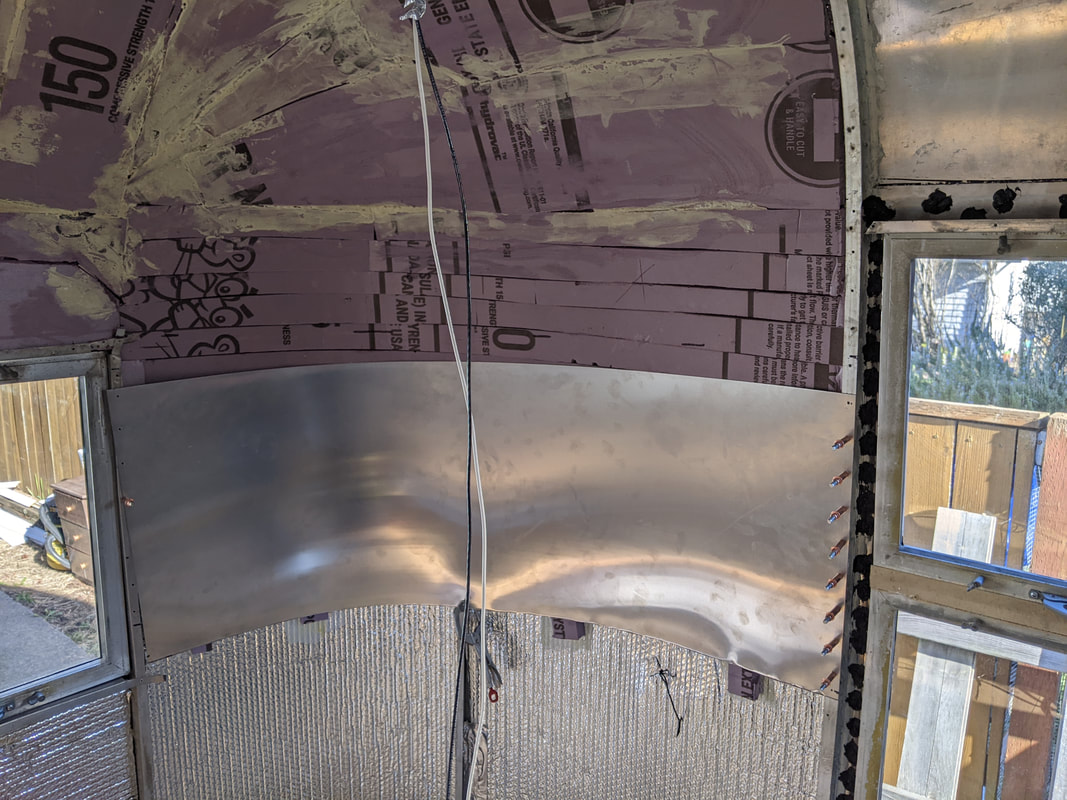
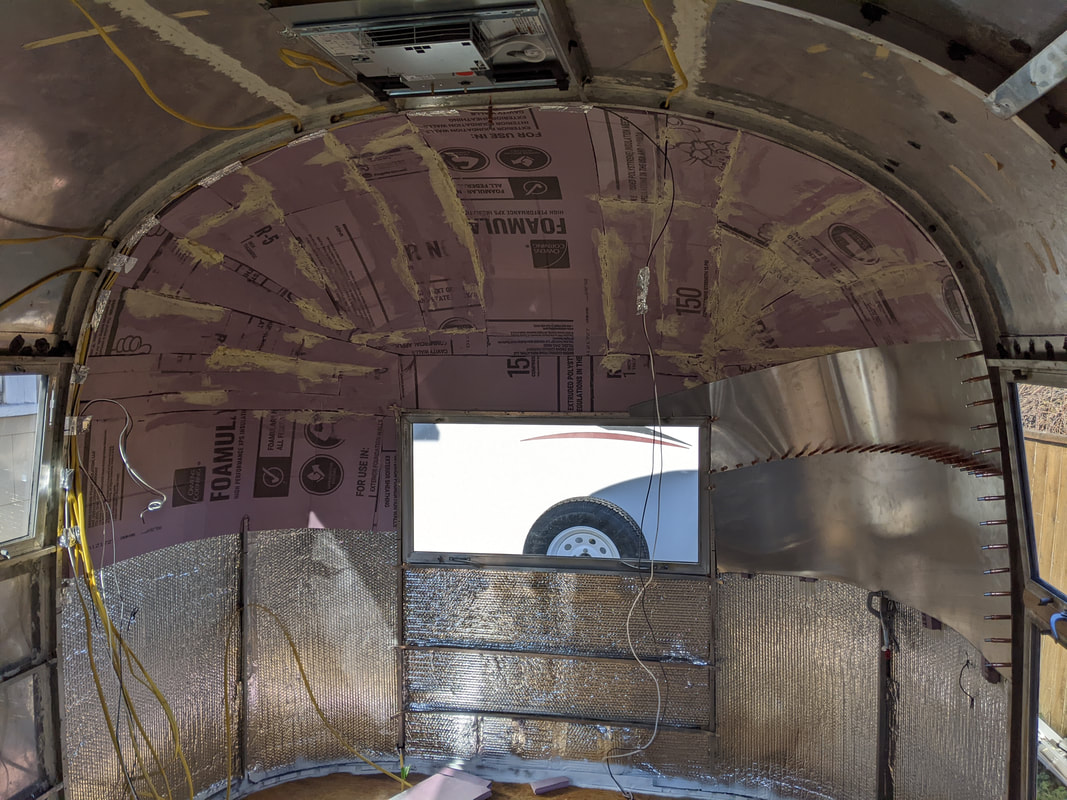
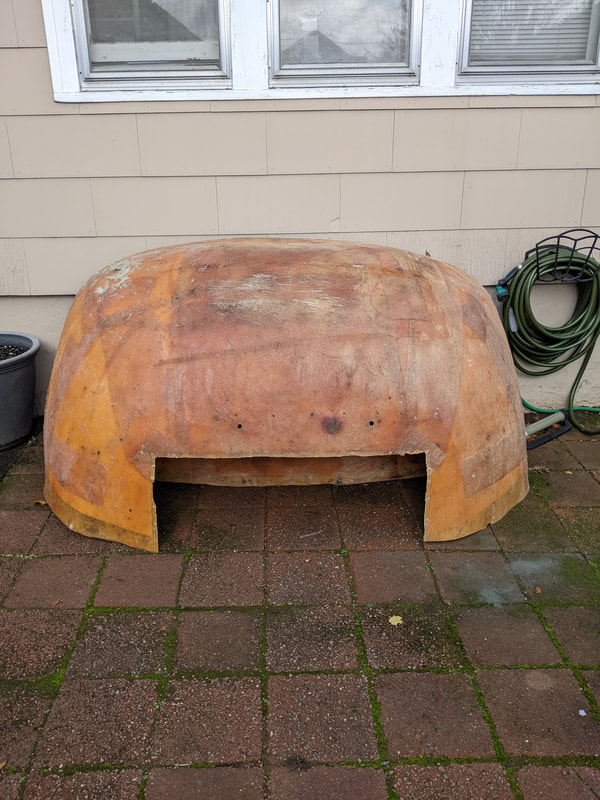
We also changed tracks a little bit after that decision (can you tell we're struggling to find the path forward?). We then decided to see how much of the rear end cap we could do using the sheets of aluminum that we have. Then we'd have a better idea of how much more aluminum skin we need to purchase. 
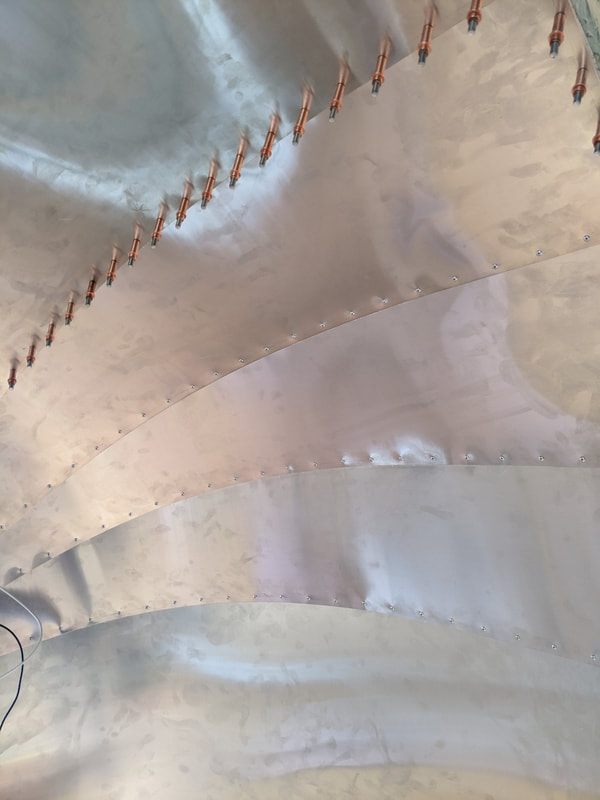
Not shown : We ran out of Clecos (the copper-colored clippy things that help hold the sheets of aluminum in place) so we had to rivet some more of the front end cap so that we could steal the clecos from up front! 
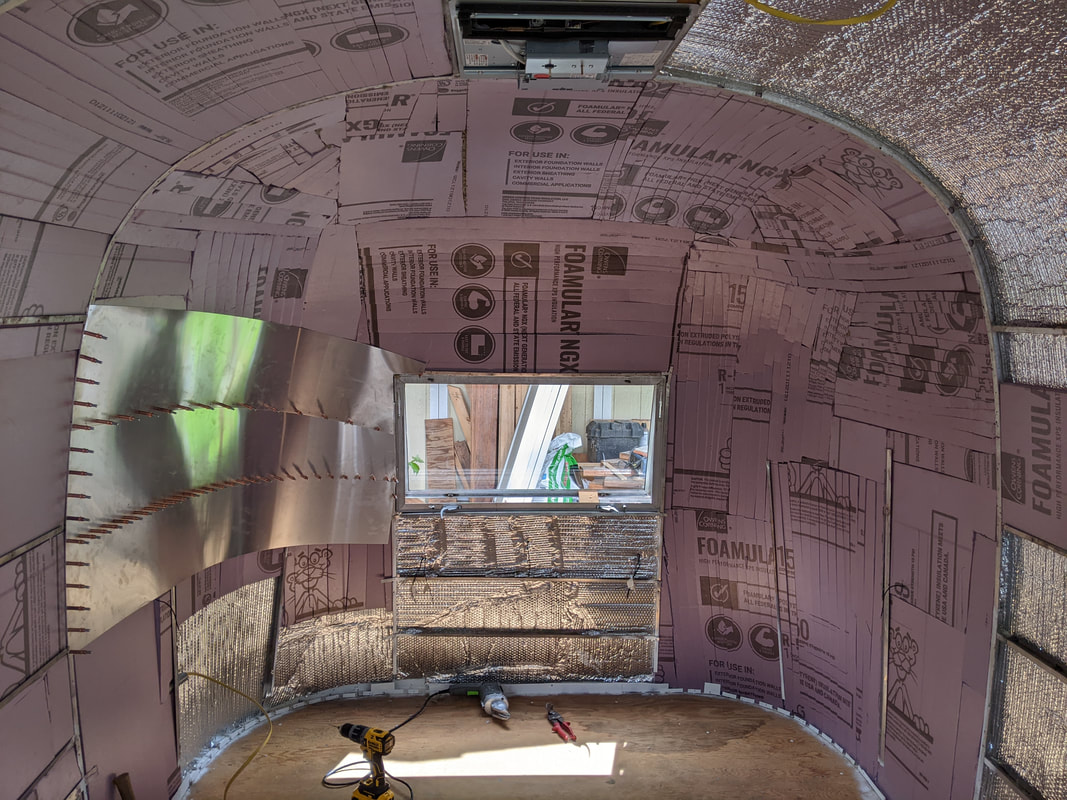
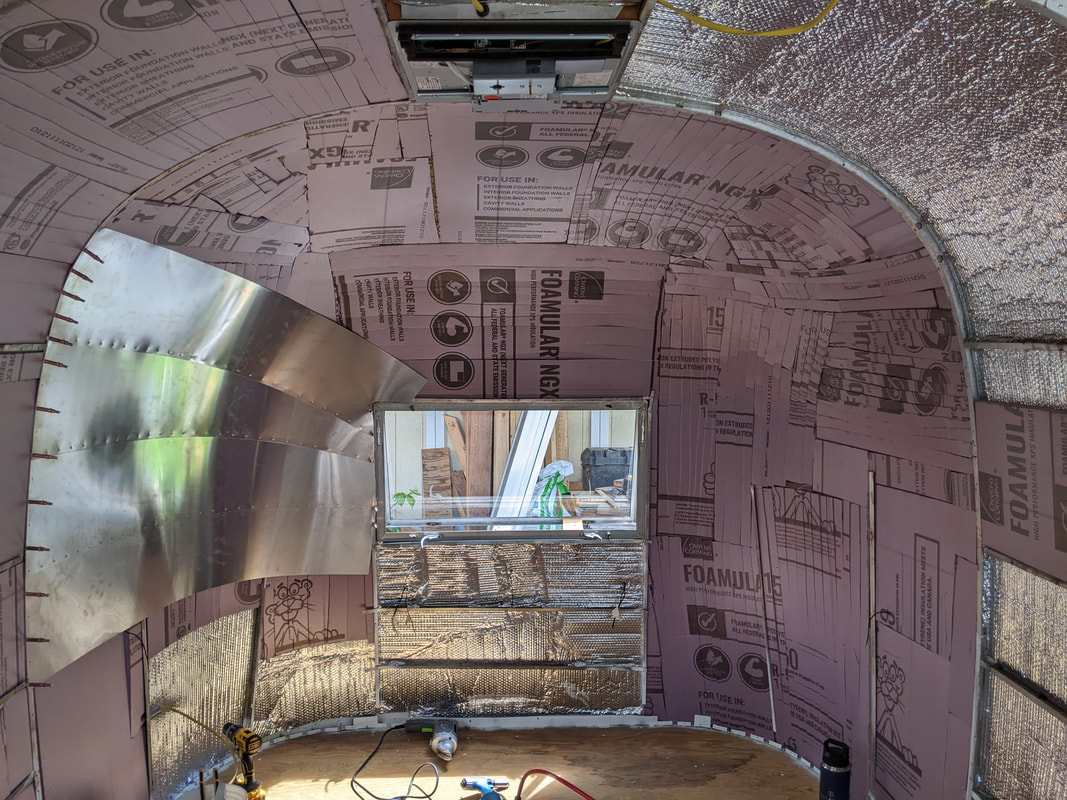
And this is how far we made it! We MIGHT be able to squeak out a 5th sheet on either side, which would be fantastic.
It felt nice to get some more work done on Maude. I know it doesn't look like a huge amount of work accomplished, but this was about 4 hours of work (not counting the trip to Costco!) Until next time! <3 Becca
0 Comments
I'm super excited to share with you all that I'm finally beginning my official training in treating dermatological disorders using Chinese Herbal Medicine! The coursework was initially supposed to start right at the beginning of the COVID Pandemic, so it's been a while coming! This weekend was our first module, and we studied the basic anatomy of our skin, basic Chinese Medicine treatment principles, the most commonly used herbs in dermatology, and then, finally, dived into studying Psoriasis. We learned how to diagnose it from a biomedical standpoint, we dug into the different Chinese medical diagnoses, and finally, we looked at the herbal strategies used to treat the different types of Psoriasis. SOOOO many case studies were presented and we got the opportunity to really dive into the details of treatment! As you are likely aware, if you've ever come in to see me, Chinese medicine breaks all diseases into different categories based on the specific set of symptoms that a patient may experience, and you treat these categories differently! So, for example, someone with headaches that hurt behind the eyes will be treated differently than someone with headaches that hurt at the top of the head, or at the base of the skull! It makes for an individualized, extremely effective treatment :) I've had some great luck at treating some skin disorders over the years, but I'm REALLY looking forward to getting much better at it and helping some of you improve your health and your skin! <3 Until next time! <3 Becca Howdy! We had a nice weekend with Maude! She cooperated a bit! LOL We continued with Mike working on the purple foam board at the rear end cap, and I worked on applying Reflectix to the skins in preparation for purple foam board later. Here's where we started this weekend: And after a few hours of spray adhesive fumes, here is where we ended! ALMOST done with the Reflectix! Just a few more sections around the door. We're really starting to notice the temperature and sound-regulating effects of the insulation!
It was really nice to have a weekend that was smooth sailing. We'll see what next weekend brings us ;) Until next time! <3 Becca Howdy! This weekend we worked on getting the insulation installed in the rear end cap so that we could take measurements to order new aluminum that FITS ;) Here's where we started: The curves really aren't much fun. I mean, they LOOK pretty, but trying to shape flat things (foam insulation board) to fit those curves is annoying ;) We have to either cut the board into little strips, or funky triangles, or score a larger piece on one side so that it will flex. It's not super pretty, but it gets the job done! We found that it wasn't particularly useful to have both of us working on the foam board - I ended up standing around a bit and feeling superfluous ;) So, I started gluing up Reflectix on the rest of the walls. It's not helpful for the end cap itself, but it's the first step in insulating the rest of the walls for later! It's starting to look like aluminum foil-wrapped leftovers! LOL Once we got this far, even though we had windows cracked, we were feeling done with the fumes from the spray adhesive. So we called it a day.
On a fun note: It was POURING while we were working on Maude. The rain sounds SOOOOO nice in there! It was a BIT loud, but don't worry, the front end cap with all of its insulation seemed to block out the bulk of it in that area! I can't wait to see what it sounds like when the insulation is all complete! Until next time! <3 Becca We got as far as we could on the front end cap last weekend. We'll need to purchase a new center sheet, so we decided to get started on the back end cap, so we can make one order for the finish pieces! Here's where we started! We used Rockwool insulation on this end of the trailer. We struggled so much with the fiberglass end cap, in part because the Rockwool insulation was pushing out and not letting the fiberglass flex back into the curves. So, we glued some remnants from the purple insulation board as spacers! However, when we held up the first piece of aluminum, we found that the insulation was still going to be problematic, so we pulled off about half of the thickness. At this point, we were ready to set up the first sheet! *SIGH* The front and the rear end caps are not the same, as it turns out. The aluminum that we have is mostly not going to work. We found that we can probably use 2-3 the 11.5"x56" strips on either side of the window, but once we start getting too much higher than that, we're going to need longer strips. Additionally, as we were holding up some of the aluminum strips, we decided that the Rockwool was going to continue to be problematic. We liked having the purple board insulation that we could press the sheets firmly against to get the nice curve. SOooooo.... we decided to rip it back to the Reflectix. LOL At this point, we were unable to do anything further, so we made another run to the store for more purple insulation board. BUT! We'll be all ready to go next weekend - at least in terms of putting in the insulation LOL
I've gotta say, this has been one of the most frustrating projects I've ever worked on, and we do all of our own home remodels LOL! The good news is that we're starting to see the absolute humor in it all. OF COURSE the second end cap wouldn't go smoothly LOL Anyways, I hope all of your projects, whatever they may be, go a little more smoothly than Maude The AcuTrailer ;) Until next time! <3 Becca It's really nice having a project to work on that feels like progress! Though it makes for boring blogging, in that the second half of the end cap is the same process as the first, just mirrored ;) Here's where we started this weekend: Mike is a freakin' genius. He took this project as an opportunity to purchase a "toy" he's wanted for a while now. We've used it a couple of times already, but it's showing to be exceptionally useful in Maude with all of her curves! What is this awesomeness of which I speak? A laser level. It helped us level the trailer. It also helped us find the starting point for the other side of the end cap :) Even with the laser level, you can see that there are going to be some minor imperfections due to Maude's imperfect shape ;) In the photo above, the initial piece of aluminum on the second side actually overlaps the front window a bit more than on the first side! We took some moments to reassure ourselves it was Maude's irregularities, not irregularities in our thinking/planning/etc. We have those too, but not in this case LOL Moving forward! We again used the laser level to position the wiring for the second sconce! THANK GOODNESS FOR THIS TOOL! With all of her curves, it's REALLY hard to either "eyeball" or measure the positioning of things! With the laser level, we first found the horizontal for the first sconce. Then we placed a piece of tape along that line on the left side. Then we turned the level to create the vertical line (the sconces align with the edge of the window!) and marked the spot where the two crossed on the aluminum with a sharpie! SOOOO simple! Though, you'll notice that it looks wonky, since I took the photo from an angle. The curves are SO deceiving! We did it! Well......... almost. I mentioned it last time, but our 11.5" wide sheets aren't wide enough for the final piece. We have a 14" gap at the top! But in the realm of complications with Maude, this is super minor. It'll cost a bit extra (which is a bummer), but we'll just purchase a new piece of the appropriate width.
When we watched YouTube tutorials on this process, several people suggested that it took them 10-12 hours to build an end cap. It took us 10 hours to get this far, so we're right in that window! Yay! Next weekend, we'll start work on the other end <3 Until then! Becca I know. It's been SUCH a long time since we've done work on Maude. She's been very frustrating (she's still leaking sporadically. We're trying to hunt them down while we also try to move forward). The weather hasn't cooperated very well (It's been too cold to do much work requiring caulk or adhesives). And we were waiting on parts (that FINALLY ARRIVED! Yay! Hence I have something to write about LOL!). Here is where we left off: If you'll recall, we just could NOT get the fiberglass endcaps to fit properly. So we decided to scrap that plan and build our own out of aluminum sheet. It's always tough to start a new part of the work, since we have to figure out what the heck we're doing ;) We started Saturday morning by watching YouTube videos of building one of these suckers. We watched these MONTHS ago, but needed a refresher. Every trailer is different, so we've already found that we've made a (some?) mistake. But it's not unfixable, so that's a REAL WIN when it comes to Maude ;) This first sheet of aluminum, as you can see in the photo juuuuuuuust barely reaches around the curve between the two sets of windows. You'll notice that the bottom corner doesn't overlap the window frame. It'll be okay, because we have the original interior skins that will cover the gap, but it took some strategizing to make sure that everything would be covered ;) Once that first sheet was in place, the pieces started really flying into their new places! Except for the initial sheet, the pieces are all 11.5" wide. What you do is make sure that the edge of the sheet lines up with the rib and then press the aluminum into the curve. It NATURALLY creates this wedged look! At the window end, you can see that each piece needs to be trimmed to fit around the window. It was surprisingly simple! Nothing a sharpie, a straight edge, and electric sheers couldn't take care of! In these images, you can see we cut our first hole for wiring in the light fixtures! It was super simple and SUPER exciting! It was SO simple in fact, that we did it twice! LOL! We cut the first one, then as we were installing the next sheet, we realized the first hole was going to be covered with the next sheet! So we moved it ;) We ran out of Clecos (the copper-colored stick-looking things ;) ) The Clecos go through the layers of aluminum sheets to keep them locked in place with the holes for the rivets lined up perfectly :) Once we were satisfied that everything was looking good and in place, we started riveting!! Isn't it BEAUTIFUL? It was round-about here that we realized that we'd made a mistake. All of the videos had said that 11.5" was a good width for the sheets, so that's what I ordered. I don't know if our trailer is shaped a little differently? If we started a little low? If we had tried to calculate it out (I am NOT a spacial/math person!) we might have figured we needed different? But, it turns out we're going to be about 1 inch short on either side of the final, center sheet. But like I said in the beginning, with all of the problems we've had with Maude, this is one of the LEAST of our worries. We'll come up with a good-looking solution :) At this point, we were ready to start on the other side! YAY! But first, we needed to make sure that the wires would all stay tucked into the gap between the rib and the insulation and not put pressure on the aluminum skin. If it did it would cause unsightly bulges. So we made a trip to the hardware store to find some brackets. We didn't find anything that would work directly, but Mike bent them into a new shape that works quite well!
Once we got this completed, we were feeling pretty done for the weekend. Believe it or not, it took about 7 hours to get this far! We're pretty stoked with how it looks! It's nice to have a bit of a "win" with Maude for once ;) And for the next couple of weekends, we have relatively simple and rewarding work ahead of us as we finish this front end, and then repeat the process on the back end! Until next time! <3 Becca Image by annmariephotography from Pixabay 15 YEARS of Thrive Acupuncture!
Holy cow! I have enjoyed every minute of working with you all to feel your best. I couldn't imagine a more rewarding (and FUN!) job for me! Thank you all for being a part of the Thrive Family :) As is my tradition, during the month of December, I have a little present for each of you who comes in to see me for a treatment! I have several different holiday flavors of Seattle Chocolate Bars to choose from! PLUS, who couldn't use at least a little destressing during this time of year? I look forward to celebrating a bit with each of you, <3 Becca Well! We had a bit of an exciting find when we went to work on Maude this weekend! Among other things, we're getting ready to get the 12-volt electrical system all wired up. This includes all of the interior and exterior lighting. All of it will get connected to the battery, so we have lights whether Maude is plugged into shore power or not! This is standard in trailers, and it will be kinda sweet, since I'll still have lights even if the power ever goes out <3 So Mike was charging an extra battery we had. He hooked it up last weekend. When we went out to work on Maude, we were greeted by a fun sulphury smell and an exploded battery! It threw battery acid all over everything, including the back of Maude. So Maude got a bath to wash it all off. The above picture is after her bath, but you can still see where the battery acid dripped down and stained her aluminum! We're PRETTY sure it'll all polish out. Also exciting has been the amount of rain we've been getting! Unfortunately, we found a bunch of new leaks around the windows at the front, back and next to the door. **Sigh** SO! After getting a bath, Maude is getting caulked some more! Upon inspection, it seems like the rain gutters over the windows were at least part of the source, so Mike recaulked the top edges of the three windows. Hopefully that takes care of the leaks! ALL of the rivets in Maude have been caulked at this point - EXCEPT for the ones around the base of the trailer that hold the outer skin to the track that's attached to the frame. While Mike was doing damage control, I started getting those rivets all caulked. It's going to take FOREVER, but the job is started now, which makes it easier to jump in and complete small sections ;)
Maude is just one hiccup after another, but we continue marching forward! Until next time! <3 Becca Last week, if you'll recall, we made the drastic decision to scrap the fiberglass end caps and build our own out of aluminum. We haven't got the aluminum sheeting yet, so we spent this weekend undoing the end cap progress that we HAD made. End caps - REMOVED! It's a little disappointing that we couldn't use them. And also that they're back, uglying up my backyard! LOL! But we're super excited to be ready to move forward once we get the aluminum!
We also took the time to clean up Maude's interior. We organized the tools, taking out the ones we weren't going to be using any time soon, and vacuumed! It felt nice to get her emptied out a bit and ready for our next moves :) Until next time! <3 Becca |